No really. I can't be the first person to think of this idea! More details on how it works, but firstly let's talk about some thing.
SAFETY FIRST :: DON'T COPY SOME YOUTUBE BUILDS!
I've watched a lot of youtube videos on making a DIY solar shower and I've seen only one that looks for sure to be pressure rated pipe!
Pressure rated pipe is number one issue here.. after that there's the whole ABS vs PVC plastic discussion, about UV rays, and potable water. The internet of course has multiple opinions and I'm STILL confused.
On the black stuff.. That's ABS and I can't find anywhere that says ABS is good for pressure, so for that reason alone, it's out.
On the white stuff.. It is simply NOT true that you can wander into your local hardware store and buy 4" pipe that you can pressurize. In the US you can MAYBE find what you need in a random Ace Hardware, but Lowes? Home Depot? Forget about it. They do NOT stock 4" PVC that can hold pressure. They stock DWV (Drain, Waste Vent) pipe that rated to 5psi AT BEST to support a head of about 30ft of water. Every single 4" fitting says "NO PRESSURE" but I see these fittings used by DIYers no their pressurized showers, and it's a bit worrying. Quotes of "Schedule 40 can handle a zillion PSI.." and it's not true. "Schedule 40" is a dimension of pipe.. it defines the thickness of the walls. You could have a schedule 40 pipe made out of toilet paper. Unless you search hard, or special order, what you're going to get is foam core PVC pipe in 4 inch. It's half the weight of solid core pipe (GOOD!) but not even a fraction of the strength (BAD!)
There's also data supporting that ANY plastic pipe that is exposed to the sun should be painted with a UV resistant coating, so there's maybe even the chance that painting white pipe black with your typical KRYLON paint is SAFER than using black ABS out of the box - even if you could find pressure safe ABS.
Black pipe or White pipe, If you take 5psi pipe, add a schrader valve, pump it up to 30psi then put it out in the sun painted black to bake, and the water expands to create more pressure.. I suggest not going anywhere near it.
If you have a local plumbing supply store open to the public, they should be able to supply pressure / dual rated PVC pipe. If not, and you're in the US, Ace Hardware is your next best bet. You might find it in stock locally (but call ahead - the central inventory system isn't always accurate) or you can order it to be delivered free to your nearest store in a few days.
For reference, here are SAFE parts at Ace Hardware.
https://www.acehardware.com/departments/plumbing/pipe-fittings/plastic-fittings/47551
https://www.acehardware.com/departments/plumbing/pipe/plastic-pipe/44876
Note the bullet point, "Intended for Pressure Use"
OK. With that out of the way, here's my SAFE build.
The Basics
This build was inspired by FAILURE. I originally decided to build a 6" pipe system so I could go across my rack and have a 4 foot tube holding 5 gallons+.
It was a disaster.
Firstly, pressure safe 6" pipes and fittings are almost impossible to find, and cost the earth. They are TRIPLE the price of 4" parts, really heavy, and so thick it's hard to work with them.
Next, I made the mistake of choosing an Oakey Test Cap in my design to close off the T of the water fill. I'd seen other youtubers suggest this because threaded caps can be problematic to seal. First problem, Oakey aren't kidding with their spec.. at 17psi that thing pops and heads into orbit. Would take your face off if you were dumb enough to have your face in the wrong place. After a few tests (with me safely protected) I charged up to just 15psi already knowing this was not going to be a reliable option, to also find air leakage anyway. Not good and the last straw of what was a pain in the ass build from start to finish. In hindsight this choice was dumb.
I did learn some useful things along the way.
1) 6" pipe is too dense and heavy
I don't need the weight of a system that can handle 200psi when all I need is 30.
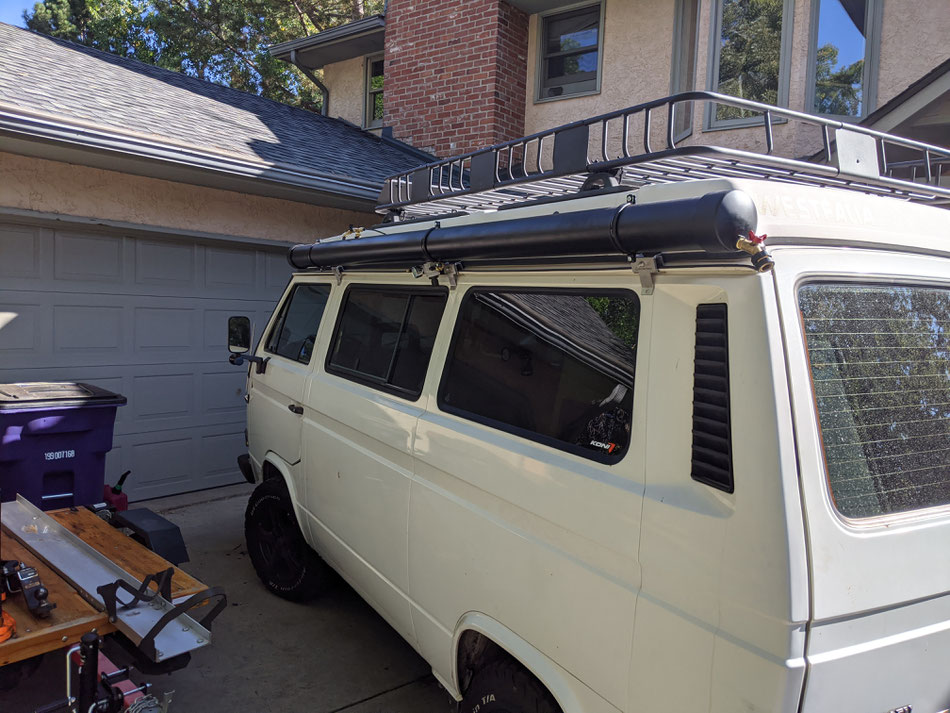
2) I don't want it mounted IN the roof rack basket after all
The whole reason I went with 6" went up in smoke when I found it was really hard to position the spigot and valve without the basket getting in the way. Part of that was the pressure safe end caps which have a significant dome compared to the (unsafe) flat end caps sometimes used. I've realized I don't even want to mount it ON the roof rack! Gutter mounting makes more sense. No weight on the poptop, and visually, no need to limit the length of the pipe to the length of the basket. Ironically, the mod that started this whole project is no longer a part of it!
3) Glue in threaded inserts instead of mounting spigots / valves etc. directly into the caps.
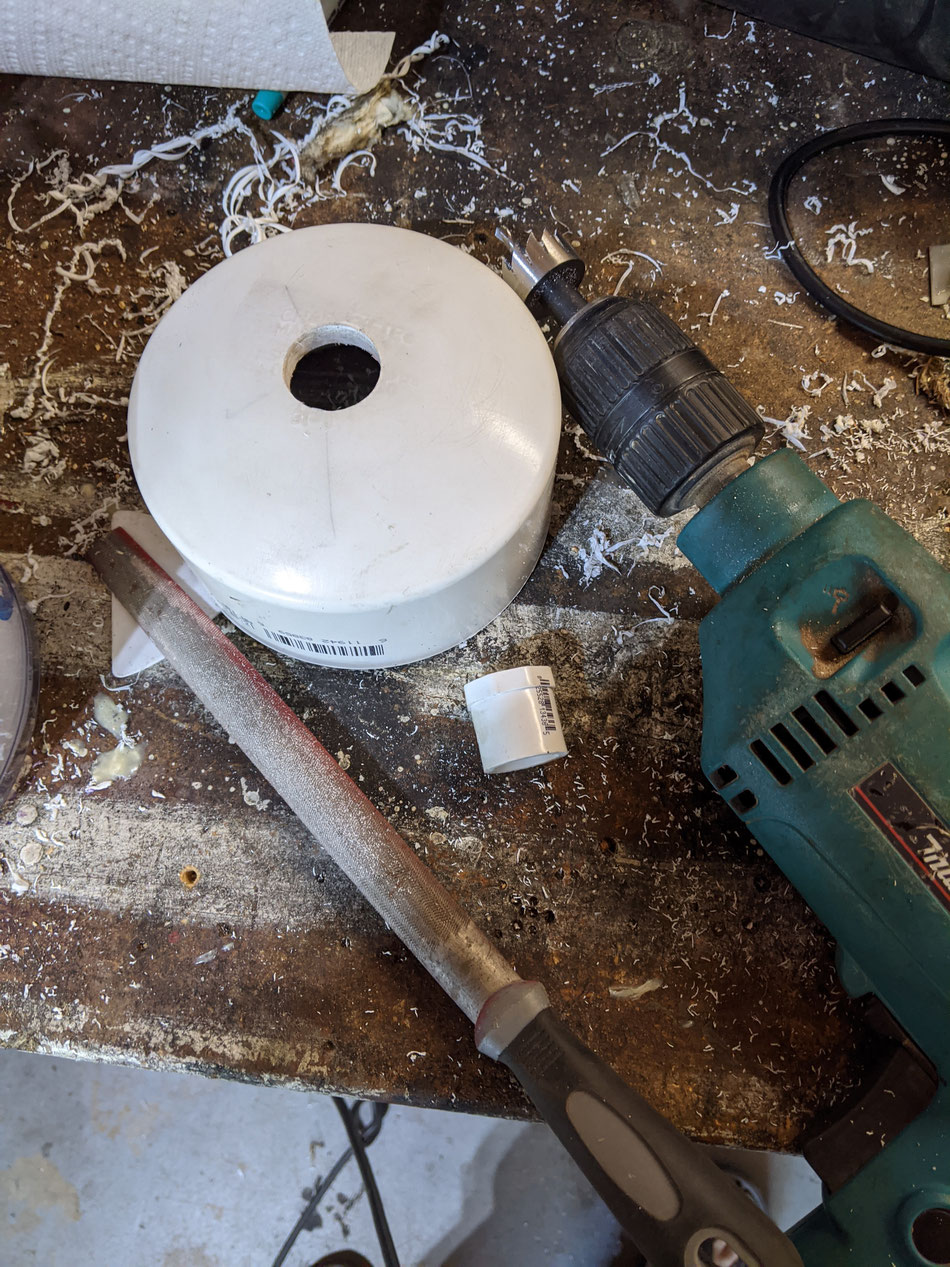
This part of the first build DID work. It's just how my brain works. If I'm going to create something where I don't have access to the inside, then I have to build it so that if any part fails it can be replaced. Having said that, hacking at the PVC with step drills was not fun, so for my new build I ordered a nice quality 26mm hole saw bit, filed out a little.
4) The fewer joins and parts the better
The T failure of the first build made me rethink the T altogether. It's not necessary.. and it's not even easy to use. An access hole almost 7 feet in the air isn't exactly "handy" so I decided the fill method would be to attach a hose to the tanks spigot and push water into it using the hose water pressure. That of course requires the addition of a breather valve somewhere to allow air to escape.
LIKE. It's simple and limits the tubes complexity to a pipe, two end caps, two threaded inserts. SIM. PUL.
What if I end up in the middle of nowhere with no water source except a river? That scenario is a LITTLE easier with A water port 7 feet in the air but not much. If I really have to, I can still use the same method, standing on the van, gravity feeding water in through the spigot via a hose pipe and an attached funnel. Not ideal, but way more ideal than having a system with an extra T that creates leaks.
5) Pressurizing the water tank itself? Why?
Yes, water pressure is needed, but pressuring the water tank makes no sense! Why have I blindly followed others down this path?
- It's only efficient if some room is left for air, and my 8ft x 4" pipe only holds 5 gallons so I don't want to give up space for air.
- Using Boyles Law if I had 4 gallons of water and 1 gallon of air, I need 4 bars of pressure in the air to evacuate the 4 gallons of water.. that's 60psi. Half a gallon of air.. 120PSI! NO THANKS. That leaves the choice of recharging the tank to 30psi during use, and annoyingly, dealing with variable flow based on current pressure.
So why not use an external tank designed for pressure, and regulator it down to a desired constant? I started to get excited.
Air Tank Options
This all of a sudden seemed like a no brainer. No more need for a valve in the water tank. The spigot can go on one end, and the pressure line and breather valve can share a threaded hole at the other. DONE.
Idea 1: Typical Handyman Air Tank
The obvious first thought was to use a "5 gallon" air tank, the kind you fill up and have handy to top up your car tires. They start at $35 on Amazon, but I usually overthink things way past the obvious. These tanks are a bit bulky and not exactly sexy sitting up there on the roof rack. It just didn't ring my bell, although the math was right. One of those at under 100psi would do the job with ease.
Idea 2: Fire Extinguisher
I have to admit, I liked this one.. it might even still happen one day because it would be kinda cool. A 5lb fire extinguisher is about 4.5" in diameter, the same as the 4" pipe. Normal working pressure is 190psi, and they are tested to about 250+. With a capacity of 0.75 gallons, they need about 100psi to evacuate 5 gallons of water. An easy pressure from my home compressor or from a gas station. That's tidy! I'd sister it up to the 4" pipe and it would look pretty good.
Idea 3: Well it's so obvious now.. (I've since upgraded to an air tank)
Wow. I'm already carrying a MASSIVE air tank everywhere I go.. I have to. It holds 10 GALLONS of air even before it's pressurized, and at 35psi it holds a huge 25 GA. LONNS. Pushing it up to 50psi (it's rated for that) is 50 GALLONS of compressed air.
This kinda melted my brain to be honest. So simple, and, unllke ideas 1 and 2, I don't need a burst valve on the water tank, because if the regulator blows and I get the full tire pressure through to the tank.. so what? For version 1 I don't even need a fill valve, nor a "tank" gauge as the air capacity is just so vast.
Moving my spare from under the van (where it can't be inflated due to space issues) to the roof rack for this purposed seemed perfect, until I actually had to do it. Heavy. Not easy, and a horrible additional effort required now to pop the top, even with the tire as far back as possible.
But wait. I also carry a spare my utility trailer. Doing some math, more than enough air in a 4.8x12 tire at 60psi to do the job.
Bingo! (Update: I can't resist the idea of an air tank, but this was kinda fun for a while).
The moving parts
Still stinging from the failure of the (expensive) 6" build, this time I put some more thought in before buying anything. After a few iterations, and sitting on it until no new ideas came up I started order stuff. Actual links to where I bought them on Amazon are included in the "Camping Shower Calcs" sheet of this spreadsheet.
Some details on some of the decisions and parts that might not be so obvious.
6mm poly cable and press fittings
This stuff is nice. Reminds me of my paintball days and so much nicer than big heavy crimped air hoses. We're only talking about 65psi on the "tank" side. This stuff will be great. Poly is much easier to bend and shape than nylon so that's what I got.
Check Valve
$8 for a one way valve. No brainer. I'd have to really mess things up for water to end up in the air tank, but this is just a bit of added insurance.
Air Regulator
These can be cheap-as-chips $10 inline, but I went with a nicer unit that cost $30.
Air Supply Shutoff
I need to be able to shut off the air supply when adding water and I'd probably not travel with pressure on. By putting this between the regulator and the water tank I can dial in air pressure, and have a reference in the unlikely event that the tire is almost empty.
Decision Time
How Long?
I decided to go with entire 10 foot pipe for a solid 7 gallon capacity. Why not? It's on the gutter now and length is no longer a concern, and weight is less of a concern. If I change my mind and shorten it, that's easy - cut and add a new $10 end cap.
Tube Design
I could make this complicated but going to keep it stupid simple.
- Tube
- End caps
- Rear End cap spigot hole low
- Top hole in the tube for breather valve and pressure feed
- The end!
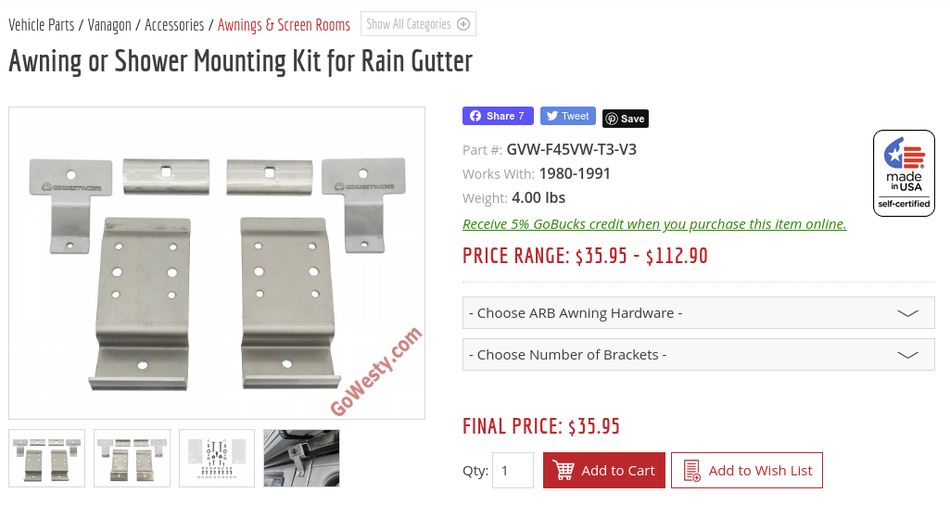
Mounting
This is going to weight around 70lbs full. I can't skimp on mounting hardware. A bit of googling and I opted to go with three GoWesty Awning brackets that are also used for the 4 gallon Road Shower. I recon with 3 of them as a foundation, and some added strength added in this will be fine.
The Build
Not complicated at all, but where many people seem to permanently connect fixtures to their solar showers, I decided I'd be better off with a threaded insert. More than that, a PVC threaded insert because I can more easily get another half twist of a brass spigot into PVC than to brass! I learned from the 6" build that the caps are thicker that expected - not fun with a step drill, so I measured the 1/2" threaded to 3/4 inch bushing and bought a couple of really nice quality hole saws to test. 26mm and 27mm. In the end, I needed a 26.5mm, so I used the 26 and reamed the hole out a little with a rounded file.
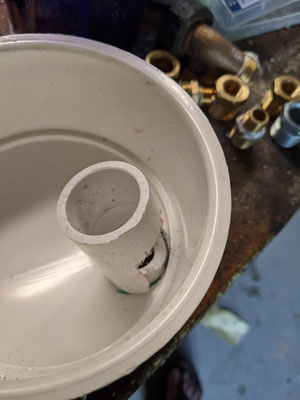
You can see on that bushing there's about an inch of contact surface where it's intended to be glued into something like a T of a 1" pipe. For safety, I decided I should in fact glue a part of a T to where this bushing protruded inside the water tank.
I had to get a bit creative with this for the end cap as I also had to allow water to flow. Still. I'm comfortable with the amount of glue contact area, and that the threaded insert is not going anywhere.


The build itself, after hours and hours of thinking and decision making was pretty quick! Pipe. Hole in the top. End caps, one of which is for the spigot. Even taking my time that took less than an hour, then another hour adding the hardware and doing a quick pressure test to 10, 20, 30, 40, then 50 psi of pressure and fixing some of the small leaks between the various threaded parts.
Bench Testing. It works, and it works well.
I cautiously added the first fill of water, shut off the top breather, and opened the pressure valve, dialing the pressure up to 30 psi.
I threw a multi-nozzle hose attachment on the spigot and let it rip. Serious flow available! I tinkered with various streams and let it run out. I noted at 65psi I saw no drop in pressure before the water supply started to sputter.
Refill of both air and water, and some more measured testing. I filled this time to 60psi. My goal was to dial in the pressure to get to the point where I start to lose pressure as I'm about to run out of water - to give me a heads up.
I ran 6 full tanks through varying the air pressure, and nozzle settings on the hose. I found the hose setting like "mist" did well at 30psi, whereas most of the other settings provided too MUCH flow and would be wasteful in the field.
Some numbers.
Mist . A fine spray
25 MINUTES @ 30psi :: Wow.
Center. A conservative 'shower' like nozzle with only about 10 individual streams in a shower like spread
13 MINUTES @ 10psi :: Wow
Flat. Think full on hose stream, but a flat slice taken out of the middle.
7 MINUES @ 7psi :: Decent
Full. Full on hose
4 MINUTES @ 20psi :: Can't expect much more than that. That's about 2 gallons / minute.
This is going to be great. The biggest appeal is actually the mist. When I'm camping, I'd rather be COOL than CLEAN, and I bet I'm likely to use the mist setting to frequently cool myself down. For showering, I think the "Center" setting for wetting and soaping, then the "Flat" setting for rinse will work perfectly. I'll have capacity for several of those.
With the pipe laid out for testing like this seemed as good a time as any to make a video.

To document what's hanging off the top, there's basically a T coming out of the threaded insert going to an valve on one side for the breather valve, and on the other:
- Check Valve (stops reverse flow)
- 1/4" NPT to slip fitting
- Poly pipe
- slip fitting to 1/4" NPT
- Regulator
- Valve
- 1/4" NPT to slip fitting
- Poly pipe
- slip fitting to 1/4" NPT
- Brass Chuck
- Tire
As I say in the video, the air on/off valve should (and will) be on the other side of the regulator so the regulator can be dial in pressure before air is sent to the water tank.
Actual Mounting
It's been so long since I started this project that I didn't take too many photos of the mounting process.
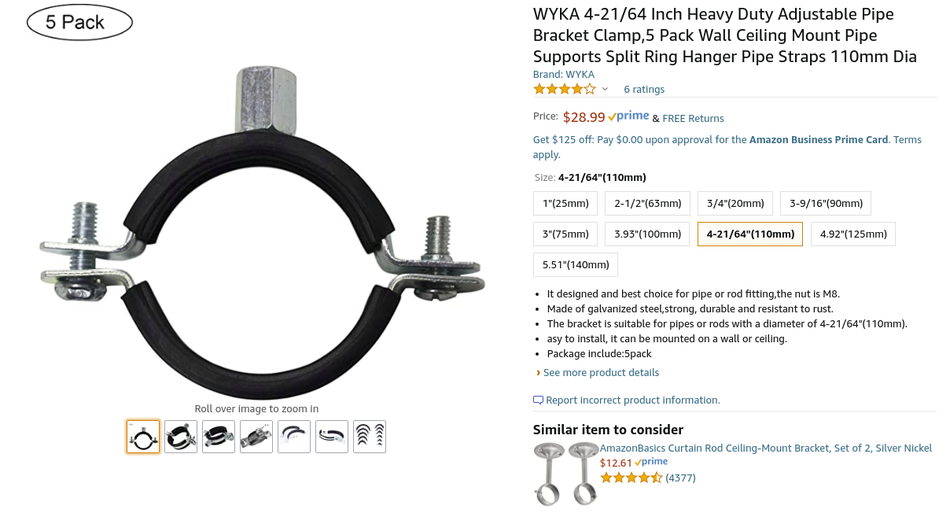
I use 3 of these clamps as a starting point. They are designed for this type of pipe either hung, or on the wall, and have a decent weight rating. They have both an M8 and an M10 thread.. I used the M10 hex nuts from my recently replaced upper radius arm ball joint.
When everything arived, including EVENTUALLY the GoWesty awning brackets.. It seemed the easiest way forward was to mount these to the vertical of the bracket, but that meant thinking through a way to add some stability and take some stress off the nut. Yes, these are rated for the weight, but probably not with the intention that the weight is driving down a bumpy road.
I took what was left of a 1 inch cutting board left over from the custom suspension spacers I made for my lowered stance and created a block that spreads the weight around the band to a large contact pad on the bracket, resting on the horizontal(ish) part it to bare weight.
(In the photo below - those aren't cracks. Just stray threads of plastic that I didn't clean up)


I have yet to add the rivnuts to secure the bottom of the awning brackets to the van but am already surprised at how sturdy this is full. Full vs Empty. No additional movement or sway on the brackets. Rock solid. I'm considering integrating an inverted L that shares the main bolt of the awning bracket and goes out horizontally to form a resting pad for the tube (will post pics). At this point it seems like that's an extra precaution rather than a necessity.
The final product.
I really love this. In the end, I'm glad I went with this over a commercial alternative beyond even the money savings. The van has the length for the 7 gallons in this small diameter, and I think it looks great. The additional of the regulator is something I think would be harder to add to an off-the-shelf product, and it's just brilliant.
Photos before final version because I just can't resist adding an air tank under the van, and that's on the todo list for the coming weekend. (Done). Here are some photos of how it looks on the van, and close ups of the components (no air tank attached). It is 100% air and water tight. Note the addition of an elbow and the nipple on the breather valve. This allows for a controlled stream of water to signify fill rather than a gurgling mess.


Some follow up pics of the details. I see that for some reason I have the top T on the left with some completely unnecessary extras. So be it!


Final Cost
I don't even want to think about how much money I have spent on stuff not used, and mistakes made. It's quite a lot. For this build itself, see the "Camp Shower Calcs" sheet of this spreadsheet for a detailed list of what was actually USED, and including mounting it comes to $270 not including the air tank which ads about another $175. Considering that mounting is $130 of that - NOT BAD AT ALL. I used some brass fitting that I had sitting around, but still - maybe $20 worth, so although I'm out of pocket a lot, if I made another one to the same design I'd be ahead of the gam.
Things I'd do differently
Firstly things I would do differently.
Put the riser hole nearer the front end
I did it the way I did purely for aesthetics but realize if it had been near the end I could have plastered the inserted bushing with glue from the back, AND added an additional ring of PVC to the exposed part like I did on the end cap. In the end, it's fine with no leaks, but if it hadn't held air I would have had to cut the section out, and add a union as opposed to just lopping off a few inches of the end of the pipe and trying again.
Glued the front end cap correctly the first time
In truth, I added the front cap with a center hole bored with a threaded insert and plug. I thought it would be good to future proof the build, but in the end the cap leaked air. It wasn't the hole itself. It was the cap wall on the pipe. I believe the root of the problem was some glue spill from doing the threaded end that I didn't remove sufficiently. Live and learn. I just cut it off with a sawzall and used a new cap. Bottom line, ANY addition to the PVC part of the system is an added risk.
Write a comment