$26 and single wire connection for simplest brake light only use case.
UPDATE: The included glue strip didn't last through the summer. See last section for the solution.
UPDATE: The included glue strip didn't last through the summer. See last section for the solution.
UPDATE: The included glue strip didn't last through the summer. See last section for the solution.
There are a bunch of these on Amazon, some 3 wire (brake and running) and some 5 wire (brake, running, turn signals, hazard). I first bought the 3 wire by accident and the brake light on 3-flash animations was obnoxious. This 5 wire multifunction unit is much nicer. A subtle brake animation as you can see in the video.

I chose this one. Not sure if the other 5 wire ones have the same animation, but probably.
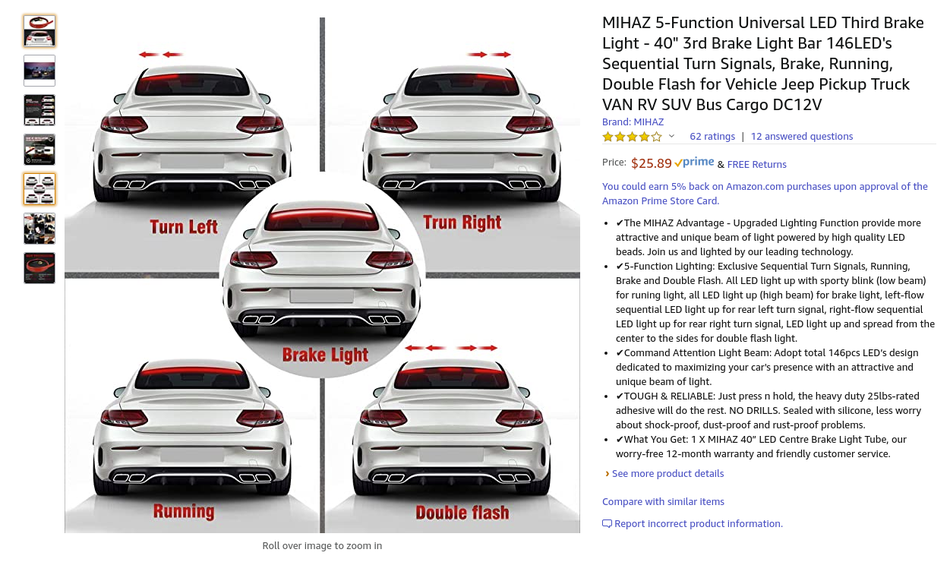
All I really care about is brakes. I actually strongly dislike the turn signal animation (full side to side) although would like the hazard feature and may add that in on a manual switch near the back, but as hazard relies on both turn signals being active, I'd have to add a double relay to make this auto fire when hazards are on. I really don't want turn signal animation.
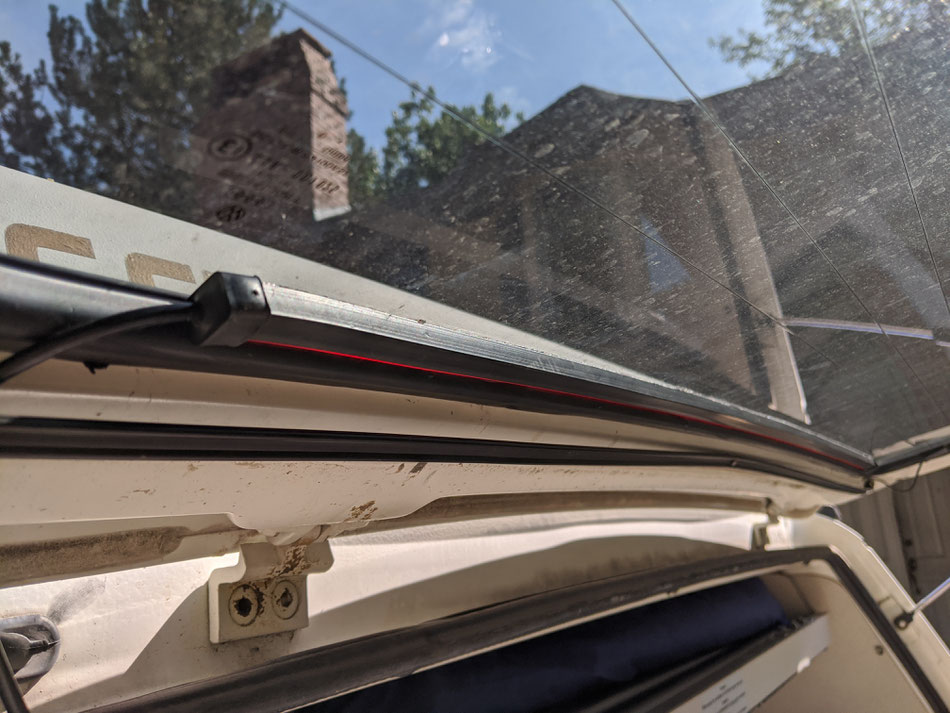
I positioned it with the wire end nearest the closet because I wanted the LED side up against the top of the window seal so it doesn't bleed into the cab and light up badly in my rear view. It bleeds a little but it's fine.
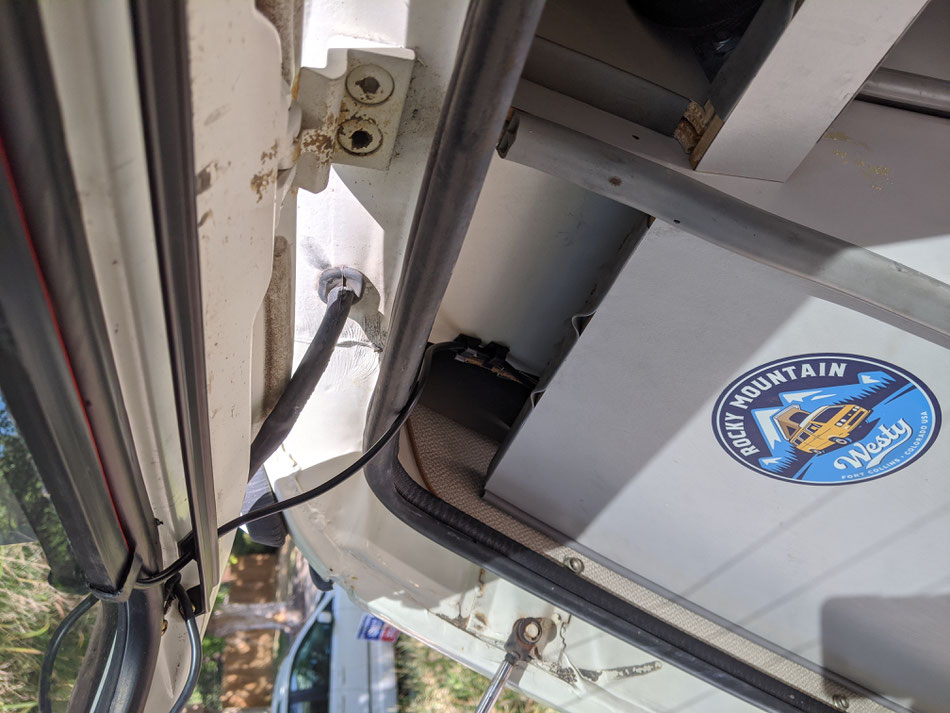
Ran the wiring down behind the closet.. nothing fancy and I don't feel the need to feed this through the tailgate to van harness. I then drilled a hole and added a grommet near the bottom of the cabinet to feed the wiring down to the behind the tail light.
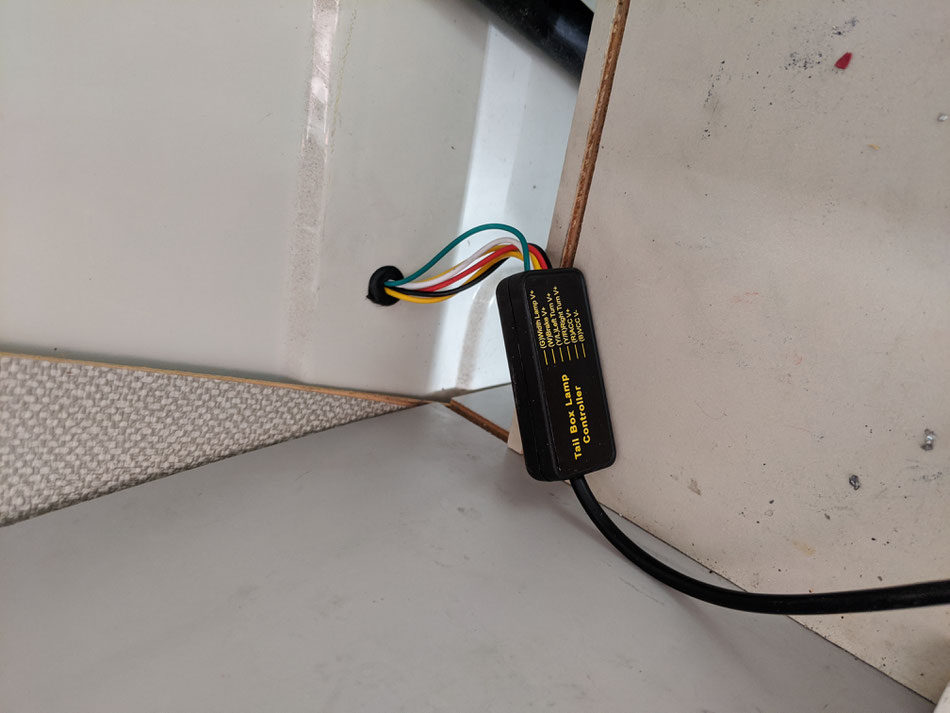
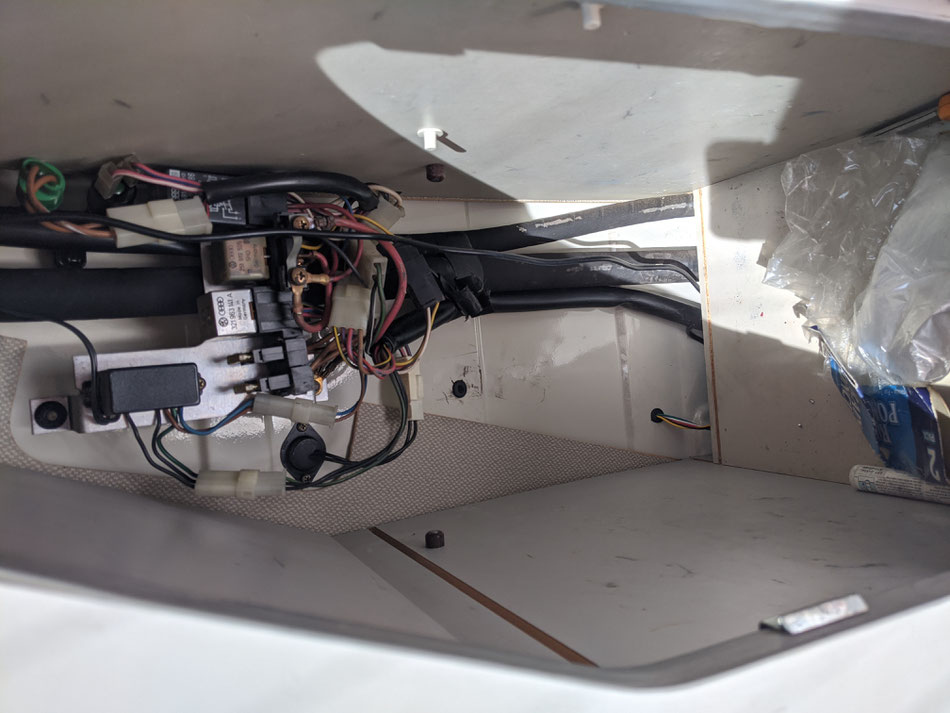
Wiring. DEAD simple. Black is ground.. attach to a ground point. Red (+ve) AND White (brake) wire attach to van tail light wire (Red/Black) and THAT'S IT.
The "normal" way to wire this is that it has a constant +ve connection, but as I'm only doing brakes, it's fine to use the brake signal as the +ve signal too. Added advantage (in my opinion) is that when you take your foot off the brakes it just goes off, instead of running the programmed break-off animation (reverse of on animation).
If you wanted a more animated brake light (may not be legal) you could go with Red+Yellow+Yellow and you'd get the hazard effect under braking)
If you wanted to run a single wire and work it through one of the grommets already there, you could ground inside the cabinet and splice into whatever wires you've chosen for "hot" and just send that to behind the tail light
SO simple. If I were to do it again it would take under 30 minutes.
Update after a hot summer
The sticky strip from this unit failed to stay attached to the rear window in the heat of summer. After a few failed attempts to reapply it was clearly not going to happen. I tried hot glue, but when that heated up the rubberized surface of the light bar came away.. leaving a mess on my tint that took a hell of a battle to make right. Copious amounts of hot clue even failed to hold it to the under lip of the AC bay so had to come up with a plan B.
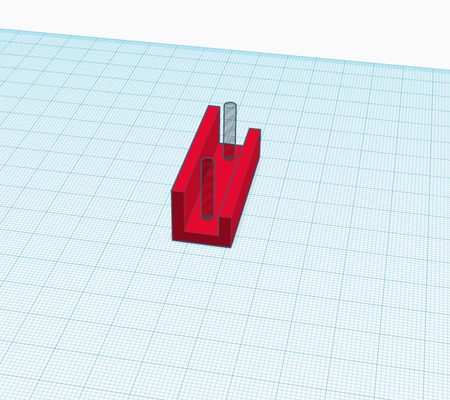
If you haven't already done so consider adding a 3d printer to your tool box.
I printed 9 of these simple clips which I hot glued to the AC cabinet that now hold the light bar firmly. They seem to be much more receptive to the idea of staying there with hot glue so fingers crossed. Note that I printed this with PETG to be less likely to warp in the heat.

Write a comment
me (Sunday, 08 May 2022 00:16)
great blog! have been trying to replicate some of your ideas. you happen to have the stl file for that clip??