I'd been thinking about 3D printers for years, but could never pull the trigger. Luckily my wife knows me better than I do, and bought me one for Christmas. I'm 3 months at this point and decent at getting a good print and designing parts, so here's my advice.
Buy one.
I'm heading off on a convoy drive with a ham radio friend tomorrow and decided to try my base station radio in the Vanagon. It has a detachable face, so why not prototype something for that and take you along for the ride?
Basic 3d Printer Options
On a budget / hobby scale, there are two kinds of printers. Resin printers for small perfect objects (liquid based), and Filament printers that prints from spools of plastic.
Filament is 100% the way to go for us Vaganauts, unless the only thing you want to print is mini gargoyles to stick to your dash.
Not only are the cheaper and cleaner to run, they can also print in a variety of materials, including some that have good weather resistance including ABS, with some added complexity over typical PLA and PLA+ that lay down much more easily.
On printer choice, here's some basic consumer decision information.
The Kia / Ikea of printers is the Ender. Very cheap, starting at under $200, readily available at your local Micro Center, and can be up and running in a few hours. It has a 200mm cubed print capacity which is pretty decent. There are those who buy an Ender only to want to throw it out the window because they can't get it dialed in. In hindsight those people should have spent more money and bought a Prusa which is more likely to "just work". On the other hand, the people who get an Ender dialed in, scratch their heads at why someone would spend more than twice the money on a machine that can only print parts half the size.
There are many others, but if you get on 3d Printer Facebook pages, you'll find Enders all day long, plus some others.
I went with an Ender. Long story short, I got a 3 Pro for $189 and have since spent about that again upgrading the motherboard, and all the fans, so it is now practically silent. I could have bought an Ender 3 V2 with the silent motherboard already in it, and if I were to buy another one - yes, one is never enough, I'd go that direction.
The challenge with getting a good print is a thing called "leveling the bed". It's ensuring that the extruder that pushes out the hot filament starts out at EXACTLY the same distance from the bed at every point in the bed, measured using a sheet of paper like a feeler guage across the entire surface. This can take some effort to get dialed in as the bed can shift on the cheap springs that come with the kit, and the bed can warp. Lots of tricks to get it working, and once it's dialed in it, maybe needs some attention once every 20 hours of printing, or at least that's my experience. Upgrading the mounting springs ($10) goes a long way here, as does learning some tricks to deal with a warped bed.
I got up and running by spending the first week printing parts for the printer. New case parts for bigger (quiet) fans, mounts for a webcam, case for a Raspberry Pi I use to run the printer remotely, spring feet for vibration free / noiseless operation. All fun stuff for a tinkerer. You will notice lots of noise related pointers here. Yes, the Enders out of the box are loud. the motor whirs and the fans spinning up and down are annoying if you are in the same room. I've got it down to silent from 10 feet.
At this point, it's all pretty dialed in, although looking a bit straggly right now with a hacked in cooling fan tied into the same buck converter I'm using to feed an LED to light the print for the web cam. See how much fun this is!!!


The Raspberry Pi isn't necessary but connection to a computer or this Pi running OctoPi avoids the need to walk over to the printer with an SD card containing your print file. Everything can be managed and monitored remotely from a computer or phone. A setup like this with a Pi 3B or 4 is only around $50 including a cheap webcam. You print the camera mount and you print the Pi case, so it's all an integrated part of the hobby.
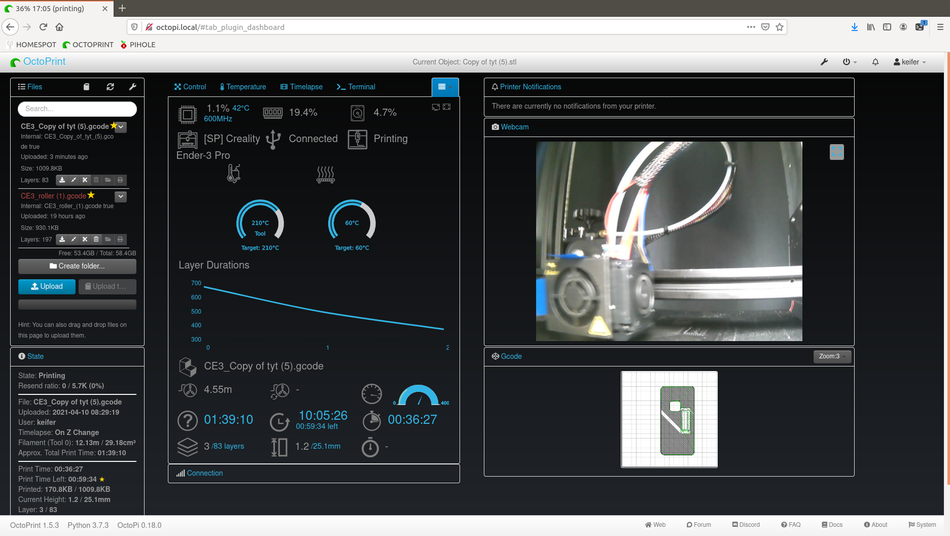
Here's a screenshot of Octoprint and the dash showing me print temperatures, what's going on with the print, how long it will take, and the webcam view. After the print it will auto create a timelapse for me. I'm a Linux geek so I have an NFS mount on the Pi so I don't even have to use the file upload button. I just save a file to the mounted pi partition and it automagically just shows up on the left.
OK.. but what do you print?
Three options here.
- Print files you find
- Print files that are mods / remixes of prints you find
- Print files you make from scratch
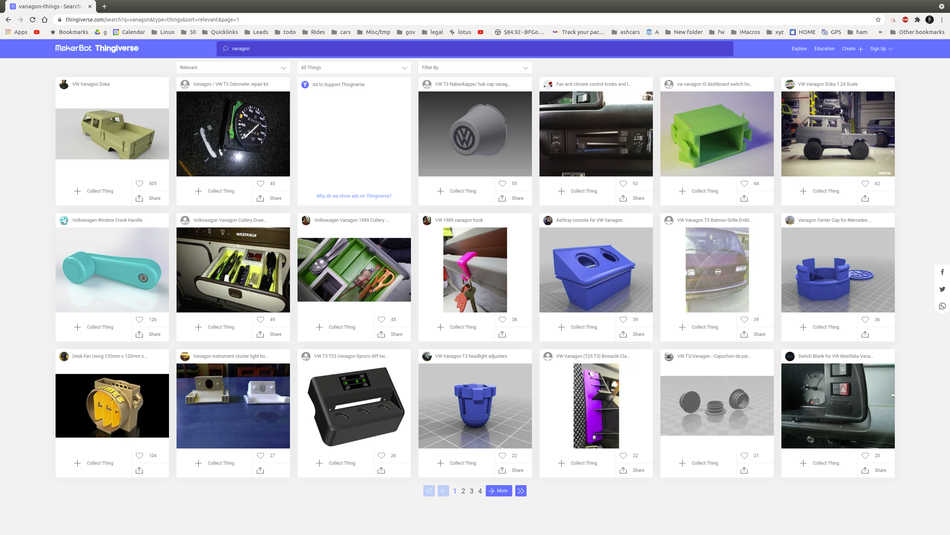
Find? Really? Yes! There are MILLIONS of free print files out there you can simply download, "slice" and print.. even Vanagon files! Here's page 1 of 6 of Vanagon parts on one popular free print file site, Thingiverse.com.
Tachometer not working? There's a print for that. Want to mount gauges in your ashtray slot? There's a print for that. Broke your window winder? There's a print for that. There are prints for lots of things.
But what if there isn't a print? Well that's when Tinkercad comes to the rescue for the newb!
CAD, Computer Aided Design has been around for a long time and thankfully, CAD software now exists that doesn't require an engineering degree. I typically try to find something that is easy and user-friendly and move on up when I take it to its limits, but I'm very grateful that after 3 months there's nothing I can't seem to do with Tinkercad.com and it's free!
I've built some things from absolute scratch with the same kind of skills that I have used in the past in graphics design software for the web.. this is just in 3d. You're basically taking shapes and holes and combining them to create objects.
FAIR WARNING. You are going to have to get used to this weird concept of measurement units being multiples of 10. I know this is very confusing and nonsensical, but metric is the standard in 3d design.
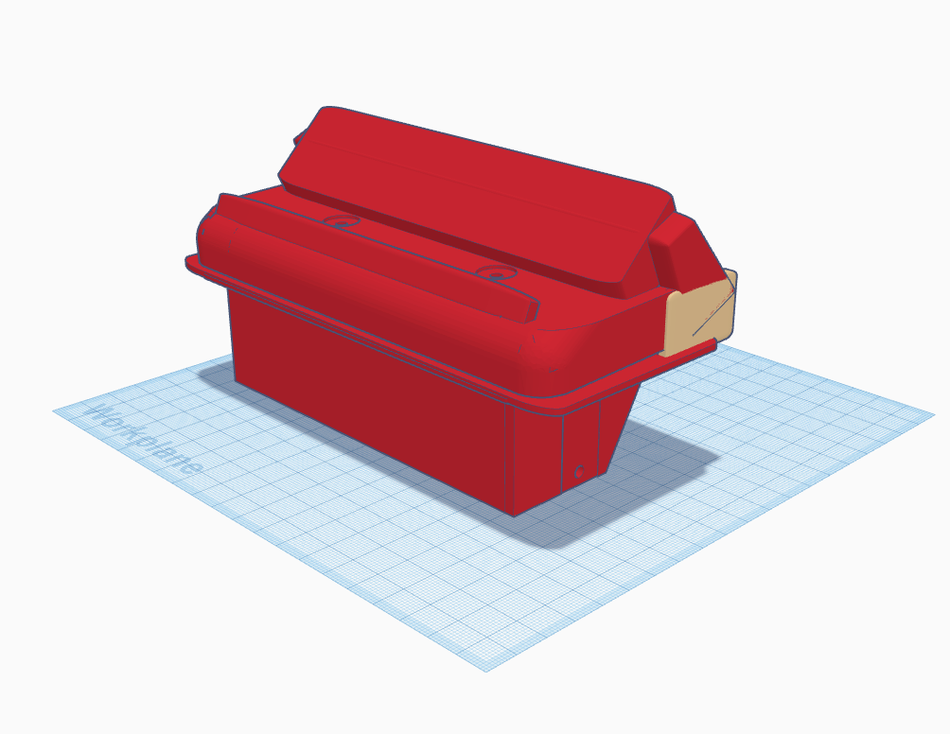
Here's a shot of the project I'm working on today for the Vanagon. I'm integrating the face plate of my ham radio into a mount at the ashtray on the dash. This is how it looks in Tinkercad ready to print.
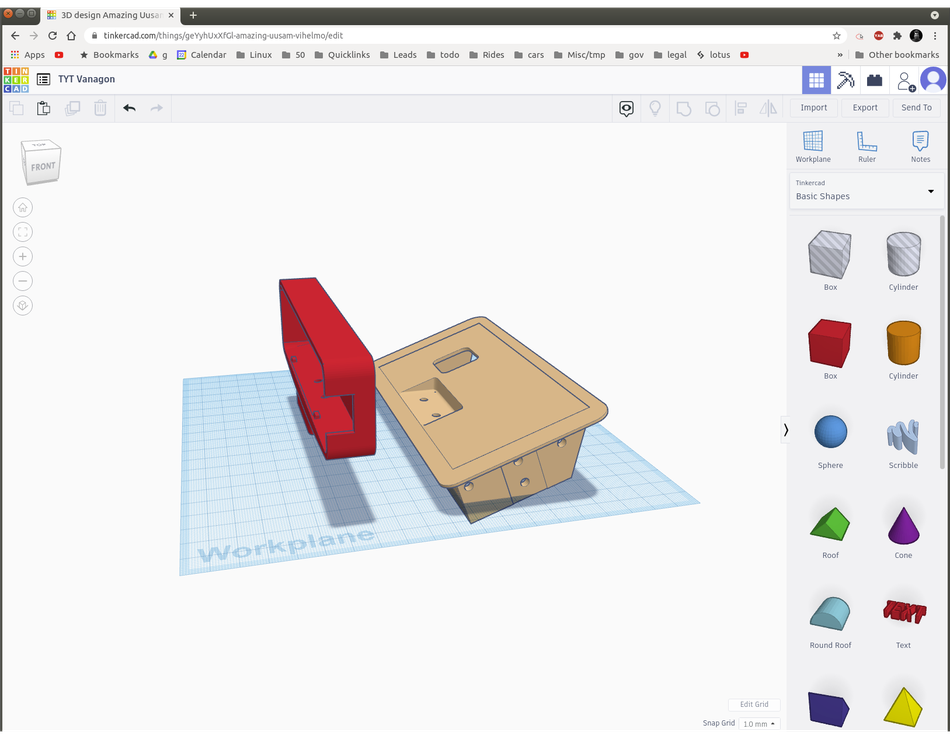
This only took me about an hour though. Here's what's really going on. I did more subtraction than design.
The hard work was done by two other people. One who created a vanagon guage cluster including the dash insert (thank you very much Mr Myyellowminicooper on Thingiverse) and the other who created the detailed dock for the ham radio face, but for a specific vehicle. All I did was add a few bits here and there, and slice off a few pieces here and there, until I ended up with mods of both parts, and a way to bolt them together. Combining shapes and holes. Not so hard.
So to print?
Let's not get bogged down in the details, but CAD tools, like Tinkercad and any others, spit out a file that detail the object in 3d. The next step is to open that in a "slicer" ( like Cura, also free) that turns that information into specific instructions for the printer. Very specific. Go to spacialy position XYZ, and move to XYZ at a speed of Nmm / sec while pushing out the filament at 220 degrees and rate of S mm/sec. Thousands and even millions of these instructions.
Luckily to create that file all you have to do is:
- Tell the slicer what kind of printer you're using
- Tell the slicer what kind of filament and nozzle you're using
- Tell the slicer which way up to print on the bed
- Make decisions about how thick you want each layer to be (and many more settings if you want) that impacts how long the print will take vs the quality of the print. Also stuff like if the object looks like there is a solid section, do you want to print it solid, or do you want to just have solid walls and have the inside hollow, or create an "infill" honeycomb.
- Tell the printer what break away supports you want it to create where necessary, because it can't just print in thin air. If there is a piece of the print that isn't supported by something all the way up from the bed, it has to build something along the way that is then discarded.
- .. and lots more if you care to dive into it.
While that sounds daunting, Cura in newb mode can be as simple as:
- High / Medium / Low quality. Pick one.
- Supports or not?
That's it in a nutshell. It takes some getting used to but it's not rocket science and this is a hobby of experimentation, trial and error.
When I first started the print times were killing me, but I'm now just used to firing off a multi hour print and forgetting about it. My phone alerts me when it's done (thanks to OctoPi) and I just roll up and check on it. Longest print I've done was for 8 hours and I let it go overnight. The longer you do this, the less you care that you have to wait.
The two parts of this design took about 3 hours total with a 6mm nozzle (slightly bigger than standard) and a "middle of the road" quality setting.
To take this design as an example, I'm intentionally building it in two sections because if one is wrong I only have to reprint it, but also both parts lay down on the bed in a way that is very
efficient. The astray insert upside down is a flat surface, then some walls so very efficient in that it hardly needs any supports printed. I'm also assuming that if I try to
integrate something into that base to make it clip into the dash I'm probably going to get it wrong first time, so instead I've put some 4mm holes in the base so I can revisit this and make clips
by trial and error that will only take about 10 minutes to print, vs the 90 minutes that the base is going to take.
Here's the first print. You'll see this is FAR from perfect.
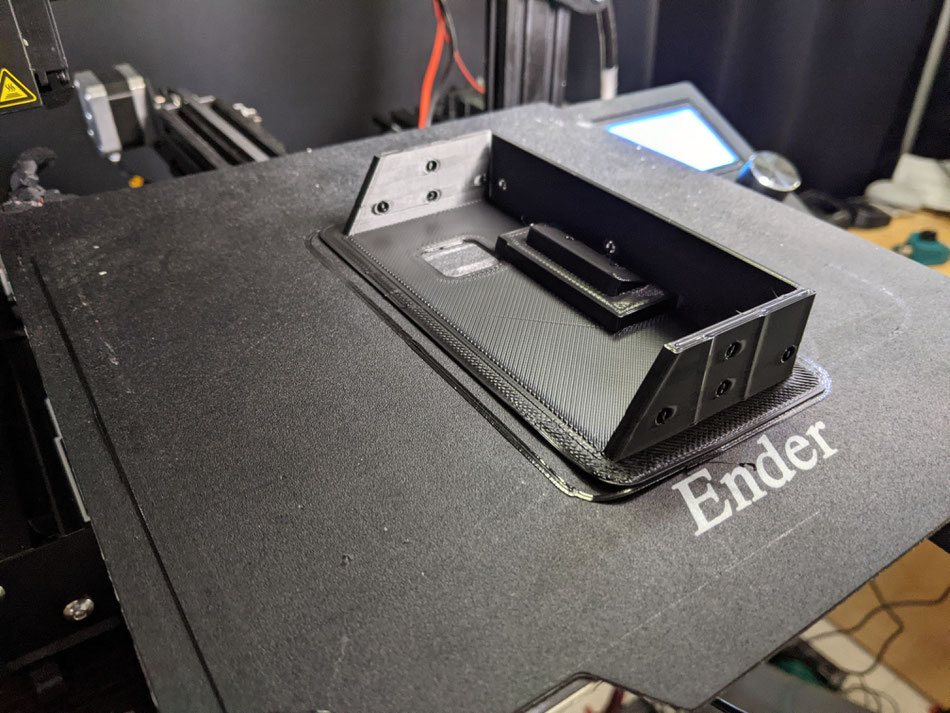
Are all 3d printed objects this janky looking? No! Not if you're willing to wait longer, but:
- I don't know the original CAD design is a good fit
- I don't know how I'm going to lock it in place yet. When I nail that down I might integrate it into the design
- This cost me about 25c to prototype.
- I'm not 100% sure I want this radio permanently in the Vanagon anyway.
- If I DO want it in the vanagon, I'm going to augment this design to have a swing up cover that looks like faux air vents, so I'm not really even started yet.
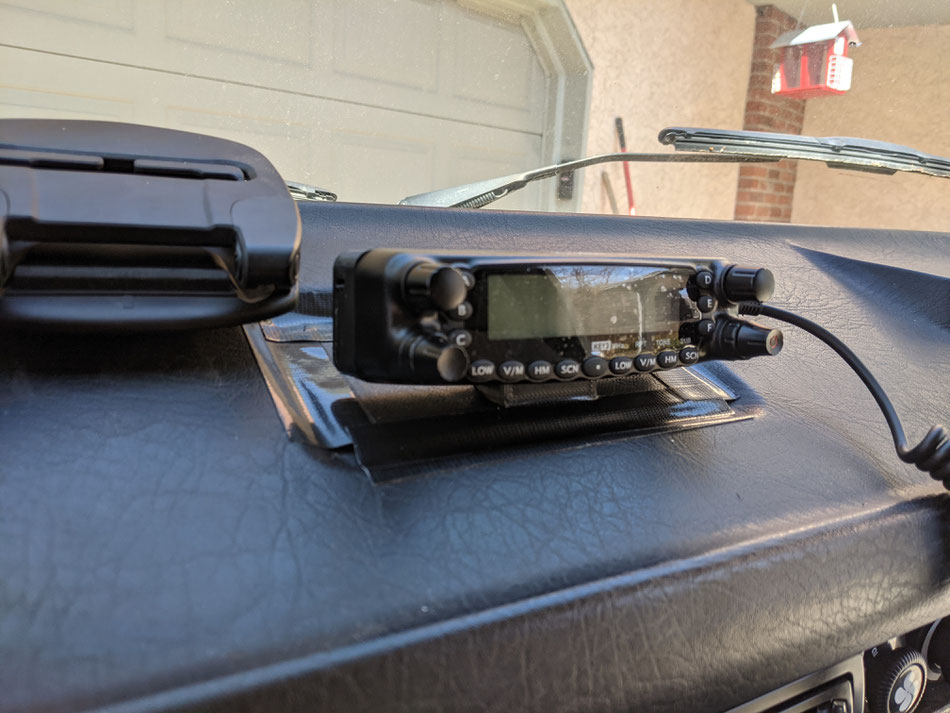
In the end this was the right decision because either the original design is off, or I've accidentally re-scaled it at some point because it's a good 5mm too narrow. I don't care. A bit or rhino tape and this will be good go to for my testing of the radio tomorrow. That's how it works. My magnetic bed cover is pretty beaten up at this point so anything printed flat on it ends up with imperfections on the mating surface. If / when I want something to be perfect, I print on a glass plate. That has it's own set of challenges, like getting the print to stick.. then unstick, but when it works, it really works.
Longer term, I've been playing with a few ideas. Here's a flip up version that when the radio is hidden, looks like a phone stand.
We shall see. Early days.
Let's print the head mount real quick..

Put it together and it looks something like this. I see looking at the actual Ash tray now that the clips on either side are what really keep it in place, and without them there is good 1cm gap around the box. No worries. A bit of tape is good enough to prototype this idea.
That's it for now.
It's 3pm on a Saturday and so far I've not only created the mount, but also the blog post, and watched a soccer match. Barca lost :(
I'll add more pics if I take this beyond the messy prototype. That depends if I want to keep this radio in the Vanagon or not. I hope I have at least achieved the objective of demystifying 3d printing a little, and encouraged you to move in this very fun direction.
Write a comment