Several times over the years I've thought about a roof build out but I've never pulled the trigger because it's kinda tough:
- most RocketBox type installs block the skylight from opening
- most roof racks I've seen seem small
- I don't like the fake rain gutter style installs I see
- a top mounted rail system on a pop top really needs 4 rails!
- ROOF RACK STUFF IS EXPENSIVE!!!!
A year ago I went as far as to go and pull roof tracks off a 90s 4-Runner as I'd seen someone else do, but at the time I could only find one donor and it needs two sets.
What made me pull the trigger this time was two finds.
- An intriguing Craigslist post offering RhinoRack / Yamika / Thule type rails for a fraction of the price.
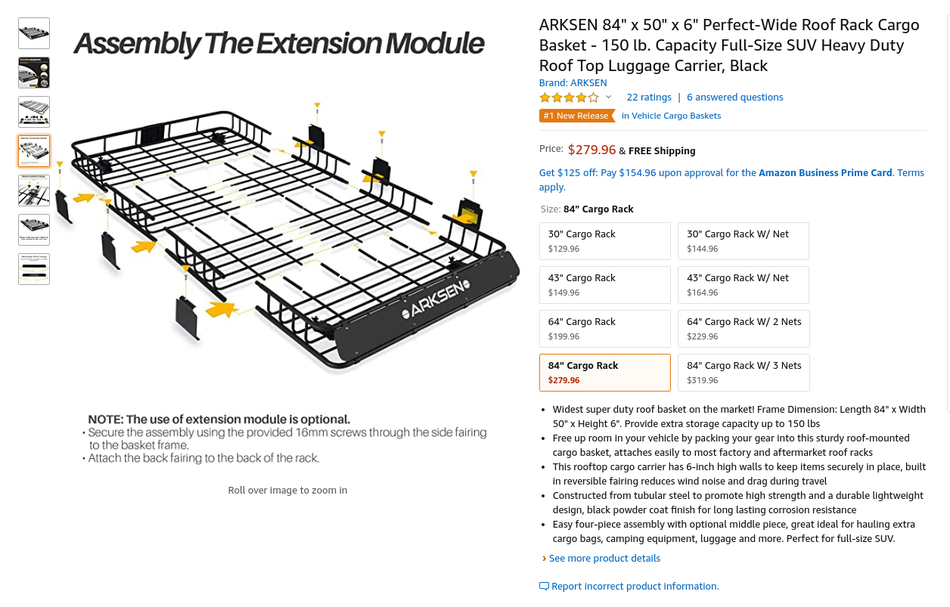
- A monster pop top sized roof basket on Amazon
After going back and forth a bit with the Craigslist guy I learned:
- he had a big stash of sturdy tracks pulled from old Fords, including 72" tracks.
- he had extra end caps
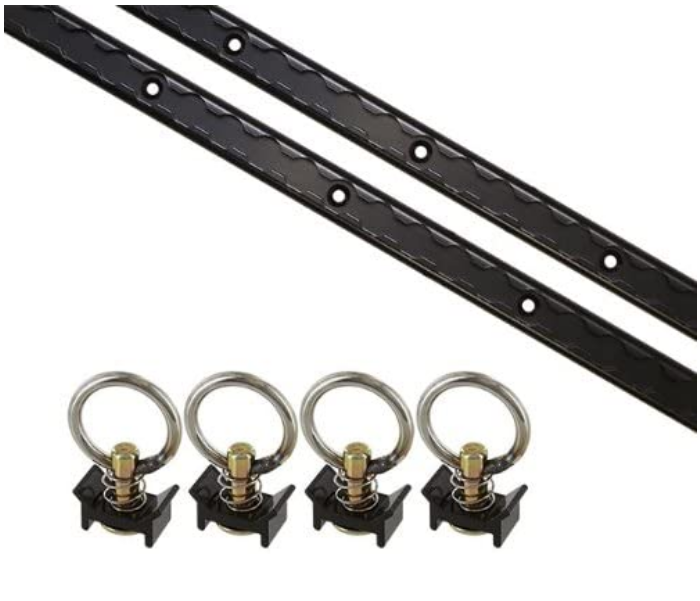
In the end I picked up 72" tracks, a full set of extra end caps, some tie downs, and a set of 39" crossbars for a grand total of $130 because the idea of this basket taking up pretty much all of the poptop really appeals. At 50" wide, that means it can take the width of 4x8 sheet wood, which is a really plus.
Based on reviews and youtube videos, I know that this isn't the best quality rack in the world. The way it's constructed isn't optimal, but I see ways to make it better, and a way to modify it so the skylight can fully open. More on that later.
Getting on the right track
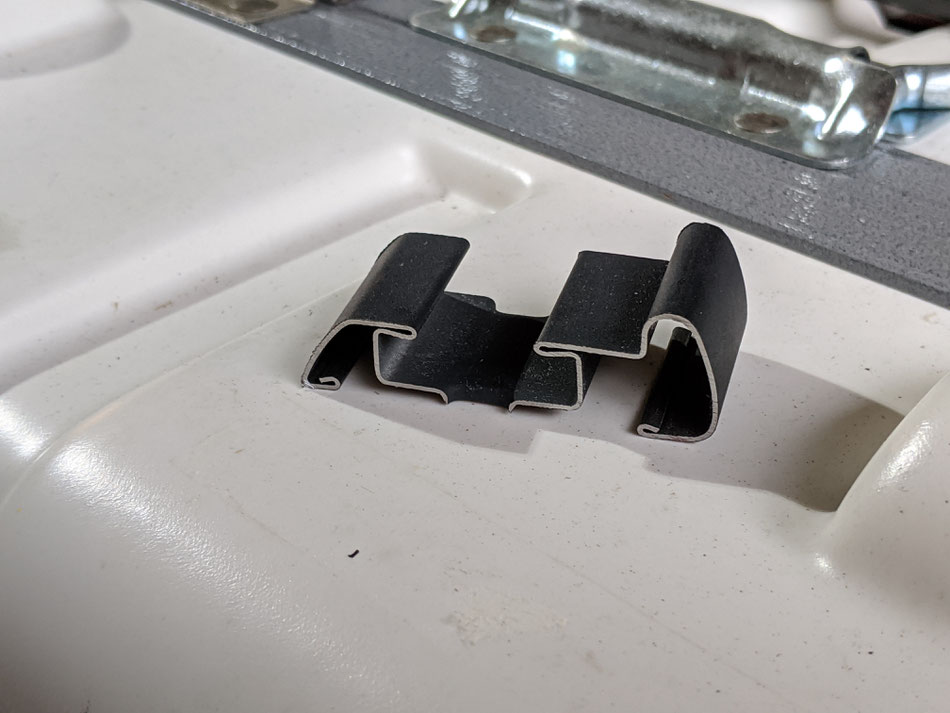
On the tracks, out came the tape measure, and the cut points revealed themselves with some ease when I considered how the end caps attached. With 3 cuts on each, I ended up with a 28.5" and 39" pairs for front and back of the poptop, each side of the ridge.
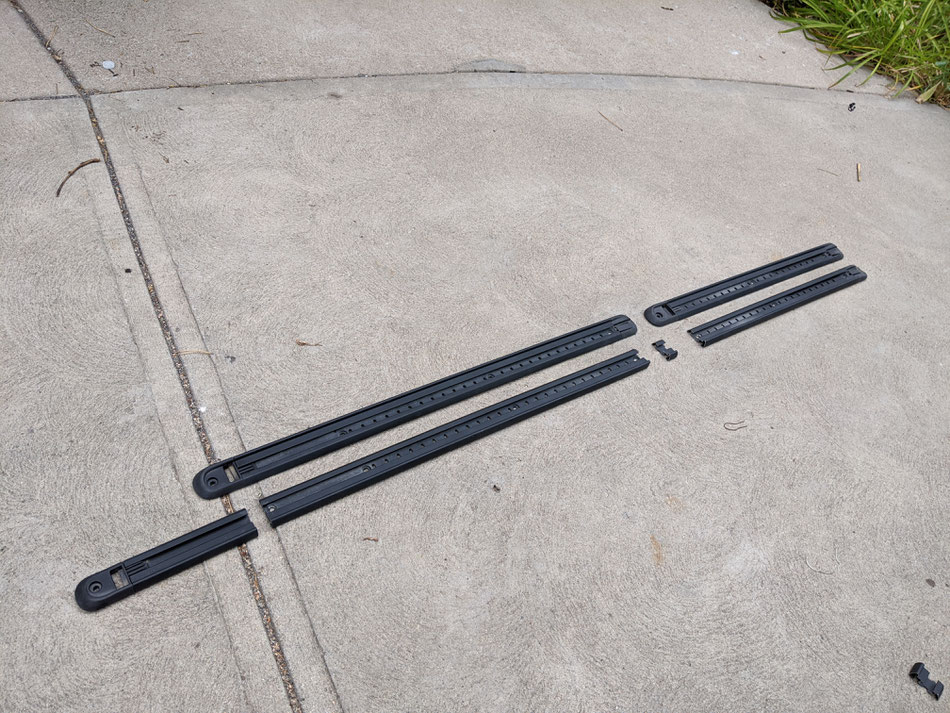
The closer track is the full run showing all the cuts. The further one is the same cuts + the extra end caps. The little 1 inch slice taken out towards the left allows means that the end piece with the open slider part mates up to a hole in the track as it should, and that the end piece that is open slips on and it's hole is the same spacing as all the other holes I have to drill. Keeping it tidy.
Now mounting it. Gulp! Drilling holes in the poptop, but I counted and there are already 32 so what's another few?
I decided a good place to start would be with the longer (front) track and one of the two bolts into the internal H bar that lifts the poptop as I know these are going to be identical side by side. (See "What I would do differently at the end!). I bolted those in then took a width measurement. Bang on 47" from the inner lip of the track. I then spent 30 minutes measuring, remeasuring, and checking my logic for locating the other end. I eyeballed the angle and set them exactly parallel (47") and weighted them down for final adjustments. I then took various diagonal measurements from the skylight bolts until I was REALLY sure that they rails weren't just parallel to each other, they were also parallel to the poptop.
With bated breath, I drilled the other end holes, then remeasured to make sure nothing had moved and drilled the other two. I'd test drilled a piece of pipe to choose a bit that was exactly the right size so adding the bolts actually cut threads in the poptop. As a bonus this meant that they torqued down and I didn't need someone to hold them outside while I tighted up nuts inside. I added a blob of silicon sealer to the hole first also. The seller provided me with the original torx head flush head bolts which turned out to be metric! Bonus! I sprayed some flat washers black to look pretty inside and spread the load a little.
I have no concerns about the integrity of this mounting. The H bar is also mounted with the same size 10mm hardware and spreads the load LESS than I have here. Having accidentally tested those mount points by driving down the highway with the poptop up (duh!) I'm good.
At time of writing this I haven't done a good rain check, but when I'm confident in the seal I'm going to cut these bolts down and add rubber bolt covers like VW did with the other poptop bolts.
I put the rails this far towards the edge because it's definitely more rigid, not realizing that it was also the perfect position in relationship to the upper bed. The bolt heads even at this length clear the sides of the bed.
To mount the rear rails I use a laser level along the bolts of the front rails, again going through a very lengthy measure, check, measure check routine. (See things I would do differently at the end) I mounted them as far back as I could without risking that the fiberglass ridge at the back would impede risers sliding on. There's a 7 3/4" gap between the back of the front rails and the front of the back ones.
I marked out the hole positions for both sides, popped the top and drilled and bolted them down.
Very very happy.

These are bad ass. I couldn't be happier with how they look, and I think they look BETTER than the Yakima and Thule tracks you can buy that are much simpler in design which would more at home on a table saw than a vehicle.
What kind of process made that?
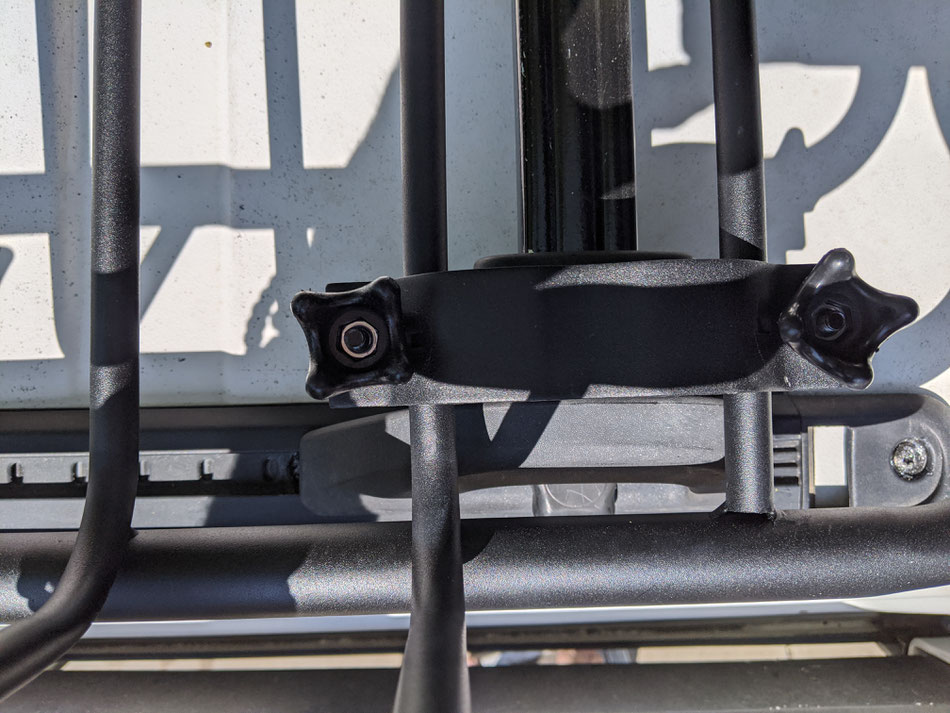
Now. Crossbars! My tracks are just under 48" center to center so the stock 39" bars are not going to cut it. I bought them because I reckoned I could do something useful with them. The roof rack comes with mounting hardware designed to mount to oval crossbars, so my thinking was to just mount them to the 2" oval part of the riser that the bar goes into. Why not? The bar is there to add overall integrity, and the rack itself would provide the equivalent structure. As chance would have it, it was big item pickup the day I went to my neighbors (the one who has the $80 10" aluminum saw blade that made that gloriously clean cut above) and he was throwing away an old bed frame.
The steel (telescoping!) cross bars caught my eye so I grabbed them, and I'm glad I did. The outer bar of the two is a really snug fit into the end of the stock riser. Bonus sliding plastic fittings that might be useful!


It's perfect, cut down to 46". At this point it's not even attached, but the fit is so snug it's ok. A todo item. It's pretty floppy when sliding the bar into the tracks but when the risers are tightened down the whole thing is rock solid. No change with the plan to mount the rack to the oval part of the risers, but this adds some more rigidity and also supports the hard plastic oval from collapsing under the stress of the rack mounting hardware. Total Win. Sprayed black it looks almost identical to typical rectangular roof rack bars like Thule.
The not so good? These risers are low. The bar JUST clears the skylight, but it's fine for now and more on this later.
Nice Rack!
This rack. Definitely some lazy design! Why on earth when the front and rear are one piece full width did they feel the need to compromise the strength of the middle ones by making them two part??? That feels like a fail and an additional place that water might creep in.
Additionally the slip on pipes that are added to span the gaps between each section of the deck are a real disappointment. The open ends that they cover are plugged which is good, but these sleeves are just going to rattle around and that's annoying. My solution was to pop-rivet them on one end, and I added a solid blob of silicon sealer into the other end before mounting them.
In fact, everywhere that there is a join I added sealant. The last thing I need when I pop the top is a rusty flow of water out the back of the rack!
I was expecting to have to beef up the edge plates that connect the sections together but I'm actually pleasantly surprised by how rigid it is when fully assembled. Don't get me wrong, this is NOT a hardcore product. There is no way I would risk walking on it up there. I think it would either bend or I'd break a weld. BUT.. that's not all bad. It only weighs 50lbs and I got it up there by myself when I mounted it. Part of this mod is vanity purposes. It looks good. I bet a solid rack you could walk on would weight 150lbs plus and there is really no reason to be lugging that kind of weight around on every drive.
I am going to have to be aware of load, especially for my planned solar shower, but it is what it is. All in this is a $400 mod, and that's impressive.
I did a whole bunch of "umming" and "ahhing" and trying to decide where this would look best before remembering that I was installing TRACKS and I could make that decision later, pain free.


How's the fit?
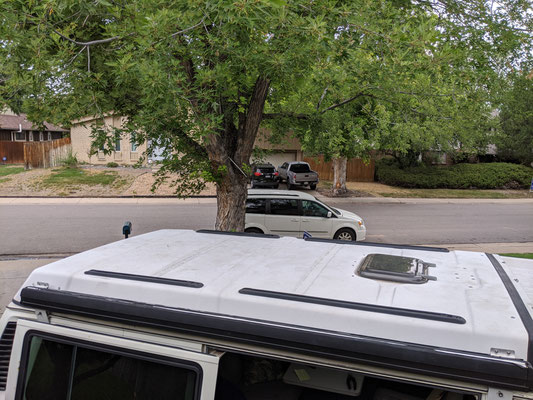
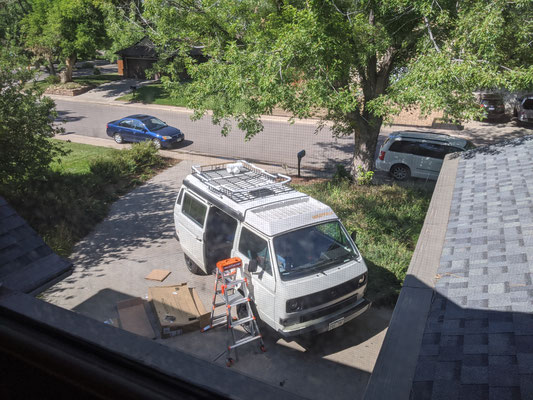
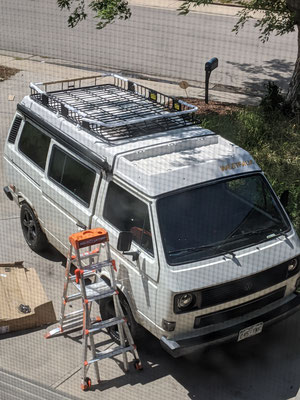
Well the end result looks pretty epic if I may say so myself.
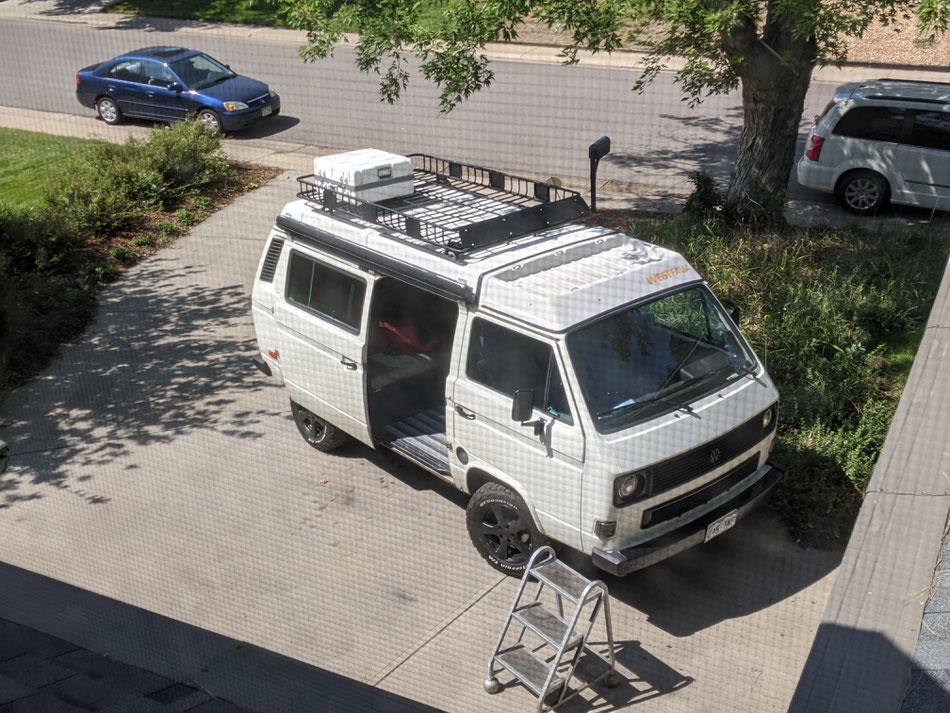
Very happy with it from all angles. (More pics to come). The rake of the front edge matches the Vanagon nose perfectly and the size is just right. I'm trying to think of something cool that my wife could make on her vinyl cutter in white for the front spoiler that would pop. Maybe VW? I'm also considering mounting that white case up there more permanently. This whole thing started when I wondered if I could store just a little more stuff outside the van to free up space for a diesel heater under the bench seat. This box would be enough for what's there right now, which is outdoor stuff like kite, folding chairs, tent pegs etc.
The supplied hardware is pretty good. I'm a big confused as to whether the upper steel plate can be torqued down so it is flush with the lower plastic. It doesn't seem so.. but it seems like it's DESIGNED to do that. To Do item. I mounted them to the actual riser, and pushed them out all the way to the edges. It's VERY solid.
What about that skylight requirement?
Work in Progress.. and it's nearly time to close it for 5 months anyway.
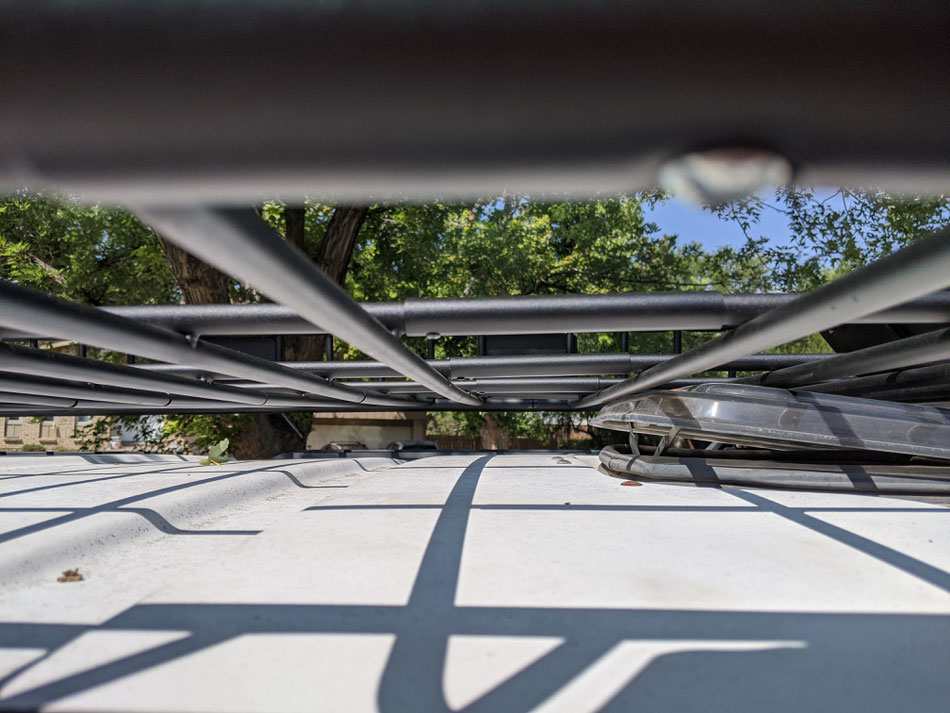
The skylight is the big thing here. With the risers being so low it only opens an inch. This is a bummer. I have four choices on how to fix this, and I'm sleeping on it for now.
- Aftermarket risers. Yakima / Thule risers for this kind of track are higher and would probably give another 1.5 inches of skylight.
- Major surgery on the rack. This is not out of the question. I don't think cutting the middle part out of two or three bars out of the front section of the rack would impact my load carrying needs. The only thing I'd be carrying this far forward would be 4x8 sheet lumber and with the skylight closed that wouldn't be a problem.
- I could add a fan.. which I kinda want to do anyway.
- I could remove one of the 23" extensions and slide back a little and the rack would stop before the skylight.
So, like I said. Sleeping on it. A solution may present itself that negates the need for surgery. If the surgery was required on one of the center pieces it would be an easier choice - they are available for $57 as a standalone product for this line of roof racks. Zzzzzzz.
Costs
Cheap. I mean really cheap because of the tracks. The BIGGEST reason I've never done this is that every time I look at roof rack hardware I throw up in my mouth. If you look at what this would cost with new parts, you're looking at something like:
$200 for tracks
$150 for track feet
$200 for risers
$100 for crossbars
!!!!!That's $650 dollars before the roof rack!!!!!!
A cheaper option is:
$70 for artificial gutter mounts
$100-200 for a used gutter mount roof rack with bars as long as the right one comes along that is high enough
.. but honestly I really don't like how these look. Not even a little bit, unless you're doing an exaggerated off center install with something like a rocket box hanging over the edge of the van.
My install - total.
$130 for the tracks and crossbars ( I LUCKED OUT )
$270 for the roof rack
========================
$400 total
That's ridiculous.
Things I would do differently
Front Track Mounts
In hindsight I wish I had gone as far forward as possible with the front track and not used the present poptop bolt as my starting position. Why? With the current risers cross bar is just above skylight hinge and limits it by about an inch from being fully opened. It's really not like me to have missed this. I think things through to death.
Not a problem right now, but if I go to the trouble of cutting bars out to allow the skylight free reign (and rain!) that will bug me. I could move it, but that is not ideal no matter which way I slice it. If I switch to aftermarket risers, I don't think it'll matter though.
Fitting Front Racks before laying out Rears
It's actually fine but I had a bit of a heart attack when I started laying out the rear ones because the laser pointer was off by a tiny amount. It made me realize just how small a mistake at the front could have lead to an inch problem at that back. If I'd laid out and marked all four at once using a straight edge to make sure they were aligned with each other, and parallel to each other I could probably have eyeballed that rectangle to make sure it was square to the poptop and required much less precision than I put into mounting the fronts the way I did. Just grateful it was right.. but for sure, I did it the harder way.
Potential Upgrades and More
Aside from the skylight dilmema here are some things on the radar.
Solar Shower
Already got most of the parts and a blog post coming up on that too.
Center Panel for strength
In terms of bang for the buck I think the addition of a plate in the area shown here in red would be a great addition.
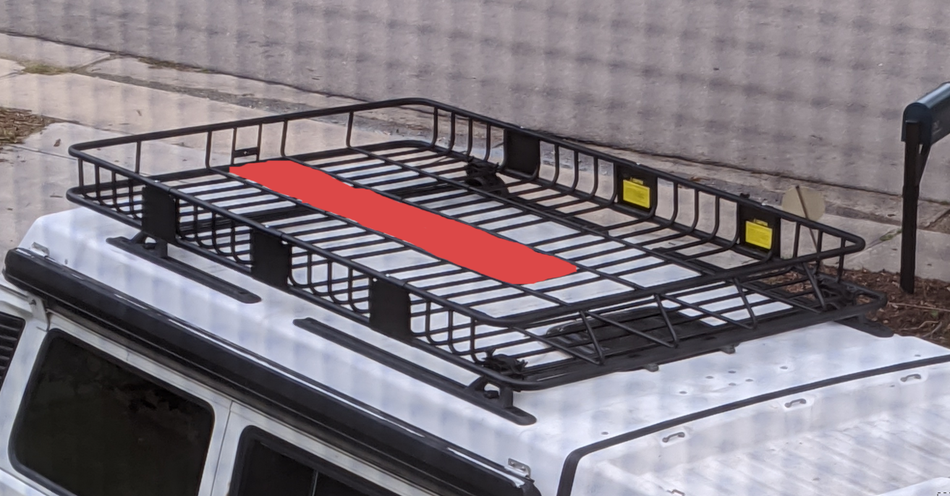
It would strengthen the questionable design choice to have the center pieces in two parts, and additionally could be a mounting point for a center foot pad down to the poptop to support more weight.
Edge strength + Accessory Mounting Points
I still have a bunch of that steel railing from the bed frame. The 6 side panels that connect the sections are surprisingly sturdy enough held on with the two bolts into captive nuts, but not enough that I would hang anything off them. I'm thinking if I bolted a black painted bed rail across the inside then one, the rack would be much stronger, but two, those panels could be a mounting or anchor point for.. whatever else I might thing of.
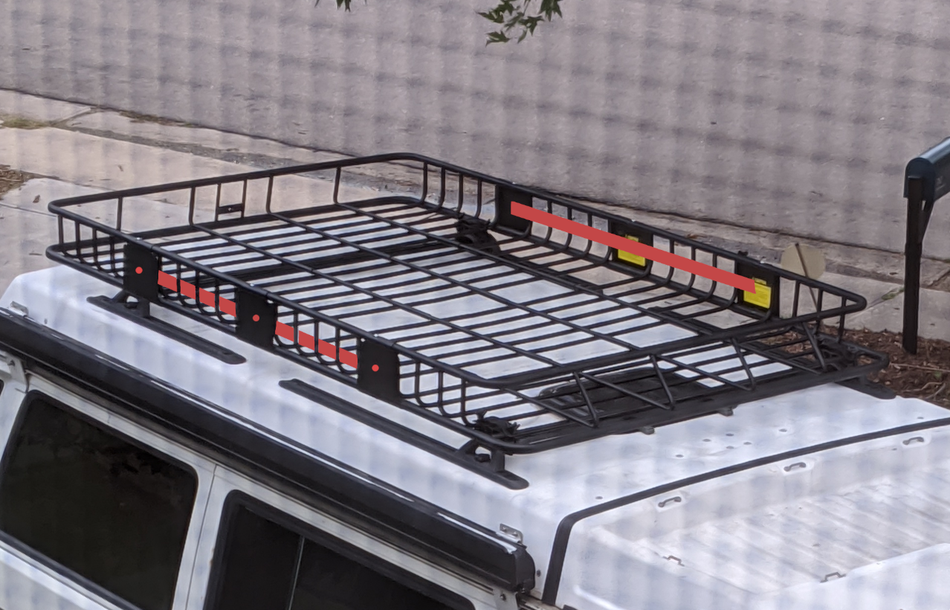
Could this at last be the excuse I've been looking for to add L-Track to my life? If you haven't seen L Track before it's a bit like T track, but it takes specific anchors along it's length instead of sliding them in. It's kind sexy! I could bolt a strip of L track to across the front parallel to the steel strip at the back.
You can get all kinds of L Track accessories including locking tie downs, captive nut mounts and more.
I think I've already decided to do this by just writing about it! Not shown in the last two pictures is there's a plate on the back too in the middle. Could get a single L track mounting point on the face of it too.
Cross Bar Finish Up
The way I have the cross bar right now is adequate but a bit "janky". I don't want to bolt through the plastic of the riser into the cross bar because that will weaken the riser, and get in the way of the rack mount. I'm wondering if I could take something like construction adhesive you buy in those caulk sized tubes that I could just fill the enter cavity with, around the bar and leave it at that. I would just feel nicer if it didn't flow around when not mounted, but I don't even know if they will ever be UNmounted. Might be a waste of time for unnecessary improvement.
Write a comment
Kevin (Thursday, 11 November 2021 20:57)
Absolutely love the idea, and the look.
I also do not want to have the unwelcome looking side Yakima mounts, with the overhanging cross mounts
My only concern is reading in various van blogs is that when you are offroad or on the highway the rack may push and pull against the relatively weak fiberglass.
Have you experienced this at all? I offroad with mine quite often and worry that if I have some weight that is anchored like this to the roof, it may eventually break the roof.
Any and all thoughts are appreciated!