It started when a used 40x48 Harbor Freight Utility Trailer showed up in a neighborhood yard sale. Since then it's lead me to fall back in love with the Vanagon, and has itself, had a thorough rebuild.
Why a trailer?
I was torn. Do I really need a trailer? Where would I even put it? I had been into small Honda bikes for a couple of years and hand managed so far by either throwing them in the back of the Vanagon, or using this trailer hitch.
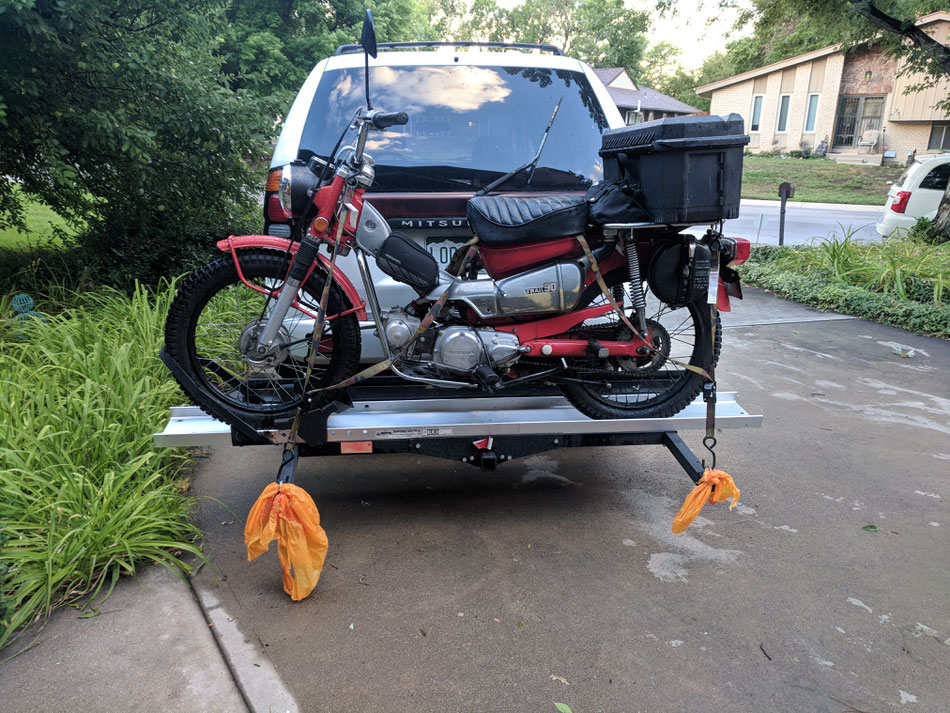
I bought this used on Craigslist for $100 and it's a beast. Capable of 600lb bikes, that makes it overkill for the Hondas, but it's quality. The BAD thing was that it weighted a ton. I remember stopping for breakfast on the way to a ride realizing my back was already sore from dragging this thing out from the back of the house and hooking it up.
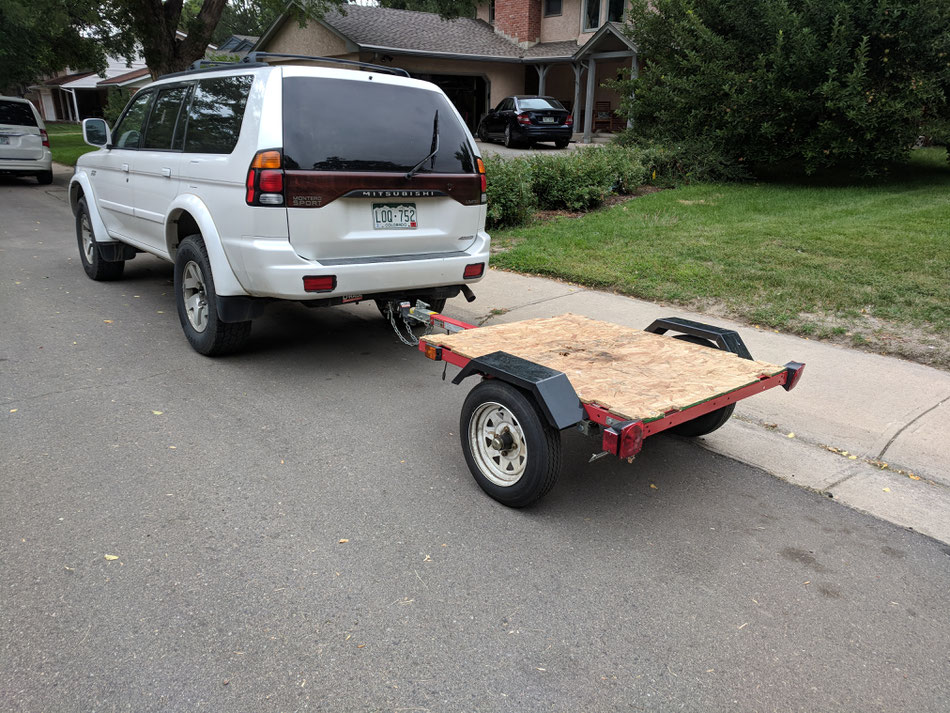
Something had to give.. so when the trailer came along in a neighbors yard sale for $75, I thought maybe I could build it out as an alternative.
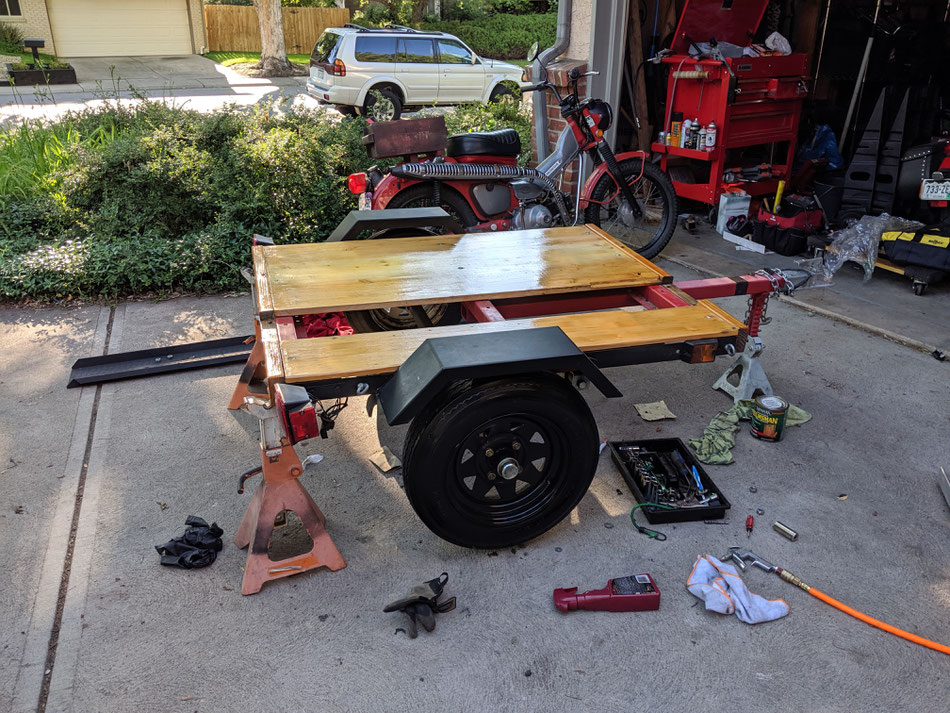
On day 1 the trailer was basic. Just a piece of crappy wood bolted on the top. Owned by a contractor it had seen some action i think, but I really had no idea how many miles were on it. When I stripped it down I found a fair amount of grease on the back of the wheels so first thing was to replace the bearings.
Not as easy as I expected. Couldn't source the oddball metric 25mm bearings locally, so just pulled them, repacked them and left that fight for another day.
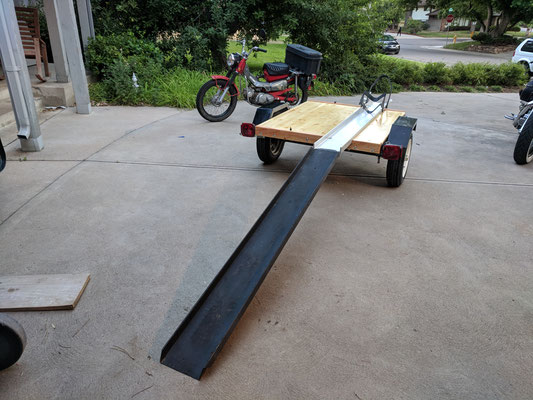
Then the hard work of standing looking at it for long periods of time deciding what to do next. I looked at things like trailer ramps, motorcycle wheel camps and rails and didn't love what I saw, then with a face palm, realized.. I already had everything I needed, of the quality I needed, in a package that I didn't like in the form of the tow hitch. Awesome.
I broke that down and did a test fit.


LIKE!
I have a crappy welder, and I can do a crappy job with it but I'm much more capable working with wood, so I made the decision to go for a retro / marine kind of finish with varnished wood. The trailer bed itself from side to side is 40", and the from end to end is 48", but the mounting points on the rails was 49.5". As sheet pine is available in 48" lengths the easy way (after more hours of staring at it and walking round Lowes) was to mount 2x4 rails at the back and front to extend the length to 51", and bolt the rails to that.
Tidy. No need to drill more holes in the rails. By mounting the rail to one side, and the ramp to the other I realized I could, if necessary carry two bikes using the ramp as a second rail - as long as I could work out a way to get it up on the trailer without the ramp.
With about $60 in wood and nuts and bolts, It came out looking pretty good.


Some plastidip on the rims and it looked even better.
Version 2
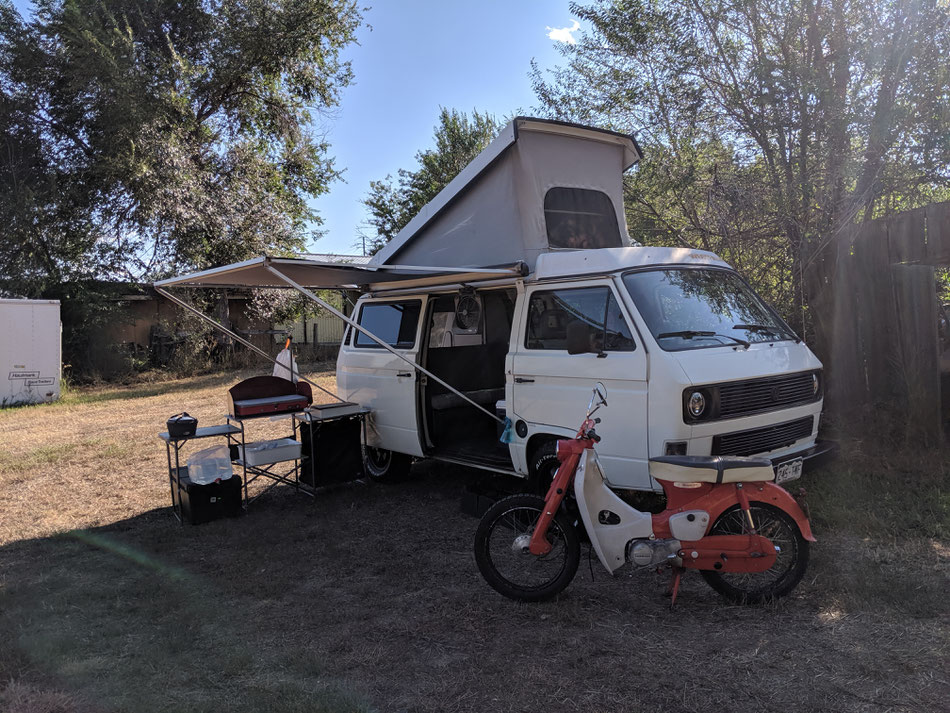
This worked great for the bike, and like I said, prompted a new focus on my Vanagon which had been sitting for a couple of years. What a perfect combo - a Vanagon and a little Honda Trail bike.
Then I actually went camping.. and didn't even take the trailer. I was (and am as of May 2020) still in the position that I don't fully trust the stock engine in the Vanagon - hence this blog which is intended to be about the coming Subaru conversion. I was torn on the camping trip. Do I tow a bike on the trailer, and add stress to the engine, or do I just throw a little Honda 50 IN the vanagon and keep it simple? I went with simple, and it was a blast. To park the Vanagon then tootle around on the Honda 50 (er.. 110cc if you look closely) with my wife on the back was great.
That short trip got me thinking. Not sure if it was that the trailer now seemed overkill, or if it was the challenge of packing the camping gear in the Vanagon efficiently, but I decided to try and solve both problems at the same time.. build out the trailer so it takes one bike and ALL the gear. I liked the idea of camping trip prep being as simple as connecting the trailer. I also liked the idea of pulling up, backing up right hand down to form an L with the trailer and having a galley style setup.
When Covid lockdown hit and the supply chain started to wobble I realized that it was a bad time to start a major project like the Subaru conversion, but it was also a REALLY bad time not be challenging myself with some kind of build.. so it began with this.
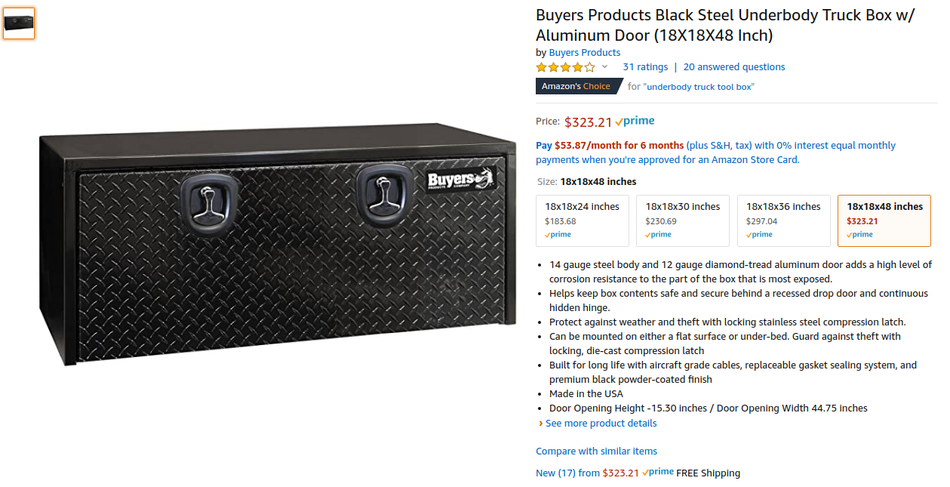
48"x18"x18" seemed about right. By raising it and moving it out over the wheel arch it would take up less than half the trailer width, and the length was bang on.
I discovered if I removed the door ties, the hinge was happy enough to let the door hang straight down. A GREAT setup for using the top surface for cooking etc.


Unfortunately, the previously arbitrary decision about which side to put the motorcycle rail on now had consequences. I really wanted the box mounted on the same side as the Vanagon's sliding door but luckily Version 1 had been almost symmetrical and I was able to spin it around with only minor modification.
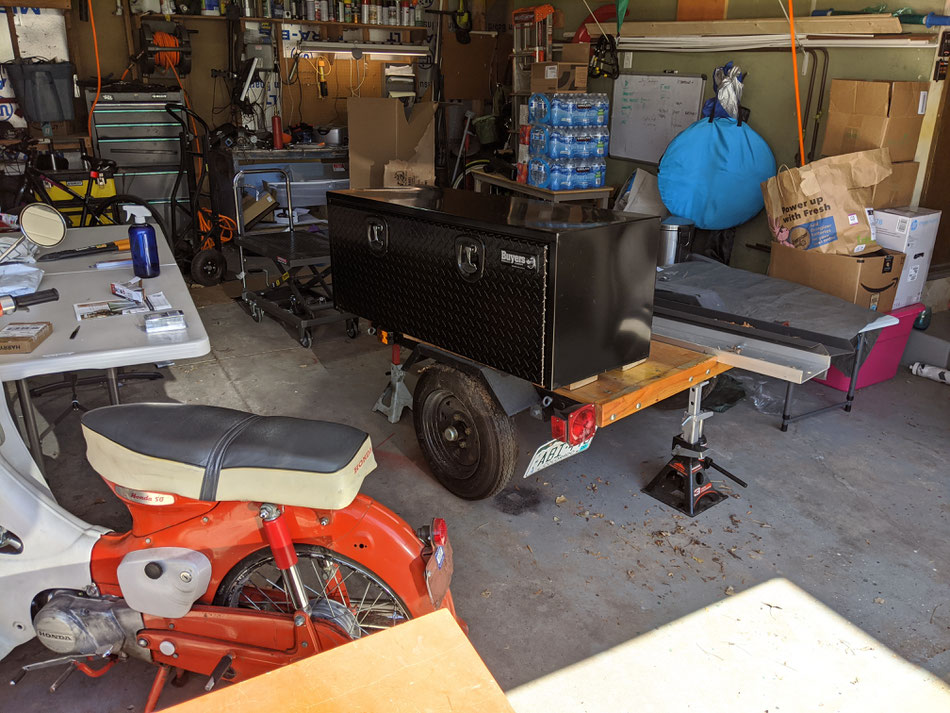
Continuing with the wood theme, it wasn't too hard to get this built and looking fairly coherent. I used 4x4 arms bolted to the trailer frame back and front as the primary anchor with captive bolts coming up into 4 holes drilled in the bottom of the box. That means the box can't simply be unbolted and stolen. It also makes it quite easily to remove and I have plans to build a rough wooden flatbed to attach to the same bolts on the box side, with a 4x4 spacer in the middle and beyond the motorcycle rail to help with the occasional purchase of 4x8 sheets, and other large object hauling.
The space under the box is completely enclosed with a removable wall for access. I plan to get a shade umbrella that can be stowed in here, and mounted up to the trailer when parked. Still on the todo list, but that 46x11 cubby should be useful.
After mounting the box, and throwing a bike on it for a test run I was pretty pleased with the results.


Now.. about this crappy running gear..
Crappy Axle and Hubs
With several loose ends still to complete..
- where to mount the ramp
- how to build out the internals of the box
- where to mount a spare wheel
.. I decided to bite the bullet and make some decisions about the long term reliability of this trailer. Fully loaded this should still be well within the 1080lb weight limit BUT the trailer instructions make dire warnings about running faster than 45mph!
Two problems to solve.
- speed rating (not that the Vanagon is a speed machine)
- carrying spares / potential bearing and hub issues
This sent me into a spiral. It's possible to get 25mm bearings in the US for these trailers from a couple of sources. It's NOT possible to get an entire hub, and honestly, if I'm at the side of the road and I lose a bearing I just want to spend 20 minutes replacing the whole hub. What I don't feel I can do is head off into the wild with no way to deal with a trashed hub!
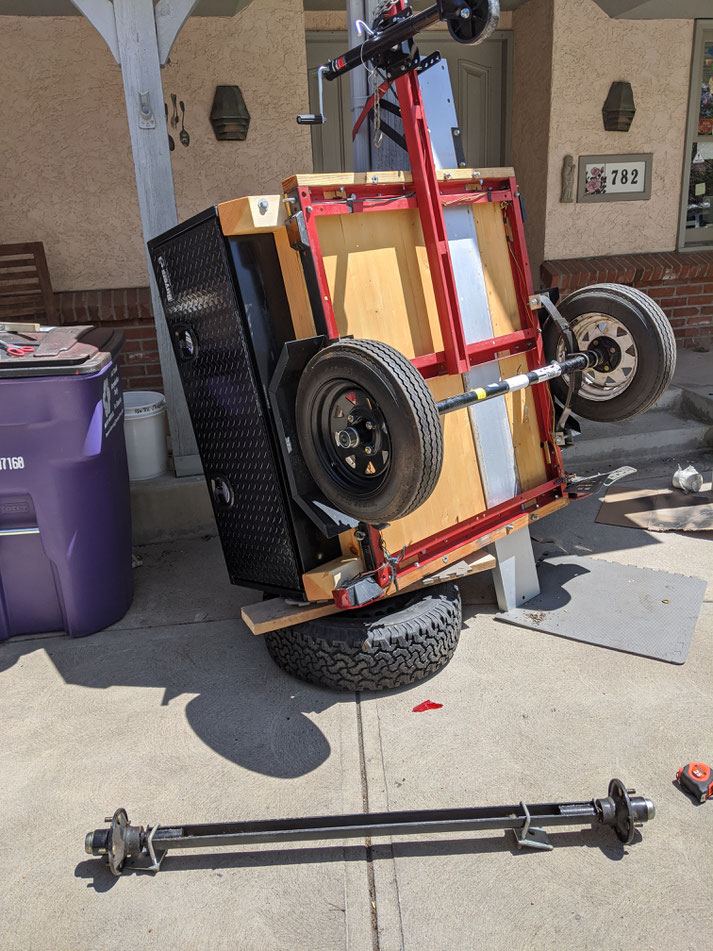
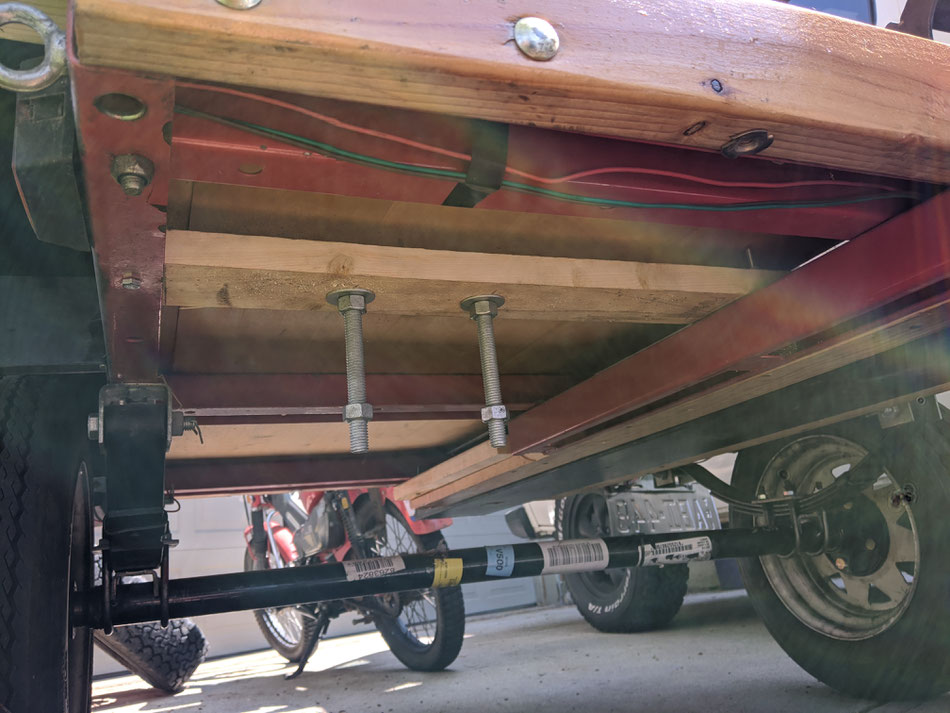
My search for a replacement took soooo much longer than it needed to, because if you use the right terms you come across a guy on eBay who sells a Dexter axle and hub setup ready to bolt on for $139 + shipping. That's what I did.. and it literally took me 45 minutes to install including the time it took to clean up and paint the springs.
https://www.ebay.com/usr/randpcarriages
Turned out to be $190 shipped, and for that you get:
- A Dexter axle ready to bolt on 39" spring to spring
- New U bolts to mate this new round axle to the springs
- What I believe are Dexter hubs. 4x4 lugs, mounted, greased and ready to go. 1 1/16th x 2 bearings and a 1.5" grease cap.. available just about anywhere in the country.
Super happy.. and who knows, maybe I can get some cash out of the HF hubs on eBay from someone like me who doesn't want to travel without any spares.
Crappy Tires!
Now about these crappy tires. They are unrated, which means they should do 65mph at best. Shopping around for an M rated tire (81mph which I will never be able to hit in the Vanagon) I found these bad boys on Amazon for $60 shipped. Can't beat that!

I'll need a spare of course, so why not use one of the originals for that, and grab a couple of cool new rims for the new tires that I can spray black.. a whopping $20 each! I like the solid look.
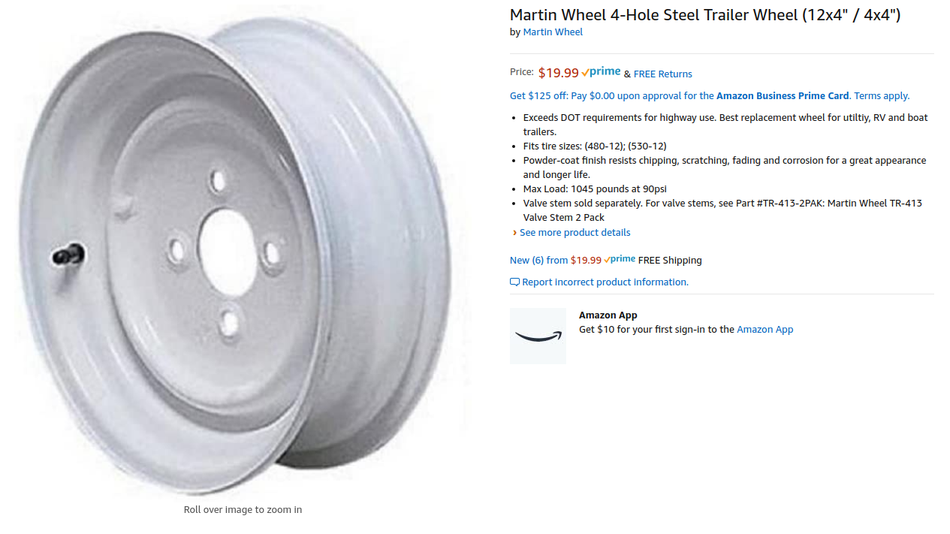
I feel like I'm now comfortable driving at 60mph all day long. I chose these wheels because they look a bit more vintage than the originals. They're nicely made and nicely painted, but I decided to go for a black finish. I used black wheel paint and wheel paint clearcoat and they turned out great.


Finishing Touches
Ease of Use / Front wheel jack
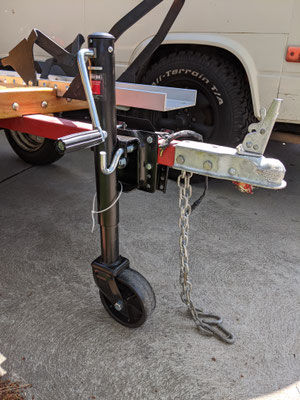
I had to just hope for the best on this purchase in terms of clearance due to the positioning of the motorbike rail, and the unyet decided location of the ramp. It turned out great though.
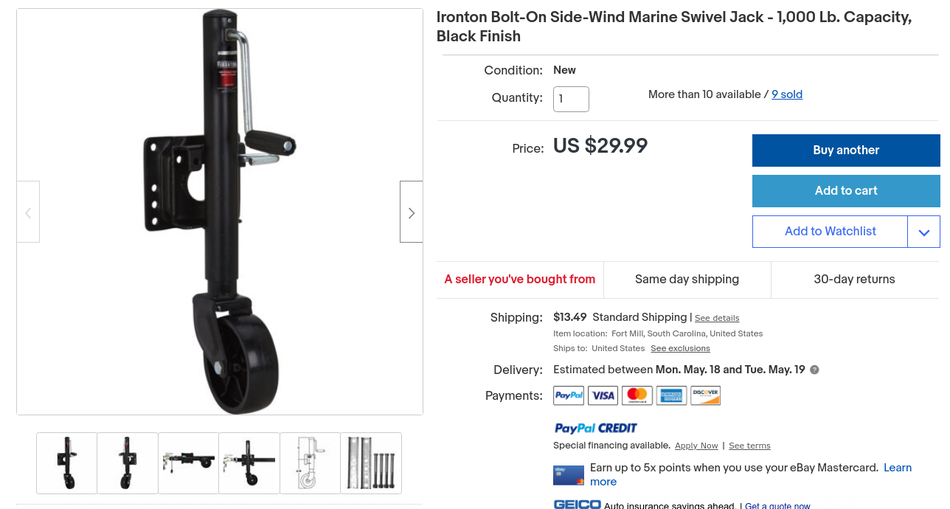
I picked this up on eBay, although actually shipped by Northern Tool. The Ironton Black Finish 1000lb unit bolted up perfectly and feels very stable. As the base weight of the trailer increases this has really helped make it trivial to move around and mount to the Vanagon. Super happy with this.

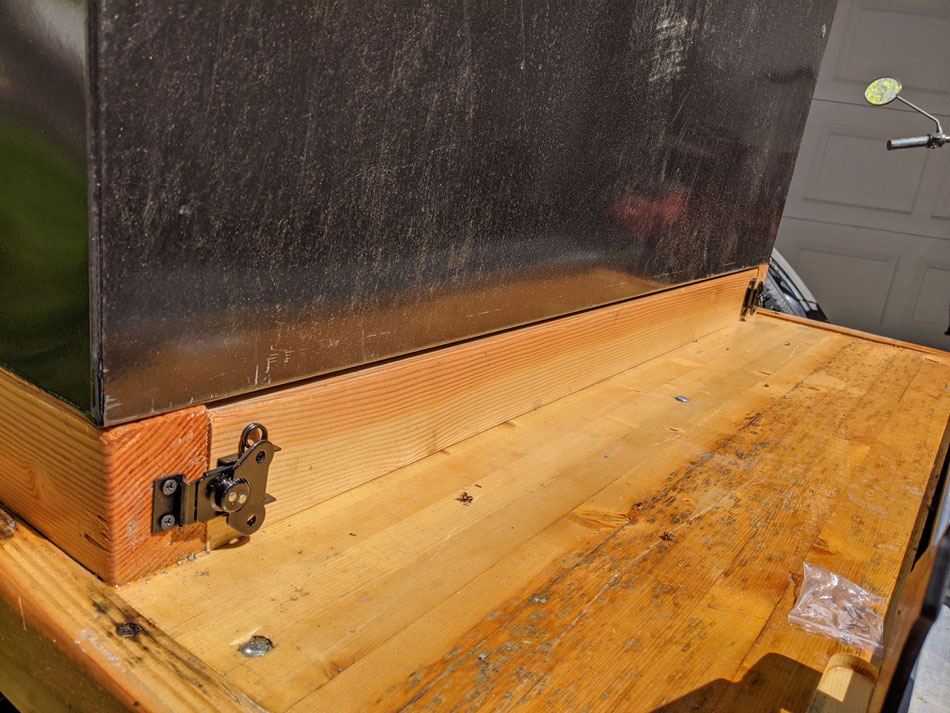
Securing the Cubby Door
In this time of COVID 19, turns out butterfly latches are still considered an essential! Next day delivery on Amazon sealed the deal, and they work great. This cubby is not water sealed and I can live with that. I could seal the door, and I could seal the wood to trailer seam, but don't want to complicate the edge between the box and the wooden mount.
Spare Tire
Disclaimer. You know when you stub something rough in to test it, then realize you can't be bothered pulling it out again? That's what you're looking at here. Getting to the end of the wood supply and the end of the day this ugly half assed brace actually does a really good job of holding a spare. Adding another bolt either end is on the todo list.
Ramp Storage
This one took much lying on the ground looking at trailer combined with standing near trailer looking at trailer. Combining the challenge of the "best" thing to do, and the fact that thanks to COVID I was running low on both wood and fasteners it took a bit of thinking. I'm very very very happy with the final result, and feel it's the perfect amount of over engineering for my level of OCD.
There's plenty of clearance between the flatbed and the axle, so why not use some of that space? My first plan was to build a tunnel for the ramp to rest on, but I realized the profile of the ramp has a lip that it can hang from perfectly. Here's the end result in action. With a hole drilled in the right place, a spring latch seats the ramp into place with a solid thunk. Nice.
Money Summary
Just the Trailer
It has definitely added up! I'm glad I started off with a $75 beater rather than the full retail of $299 because I would have been in the same boat with the tires and axle.
Looking at the trailer itself, price for trusted axle, hubs, bearings and tires (and creating a usable spare tire)
- $75 Trailer
- $190 Axle & Hubs
- $100 Wheels & Tires
$365 into the trailer itself
I am perfectly ok with that. I don't think I could have hit that for a new trailer of the same quality parts.
Build out of the ramp and box
- $340 Toolbox
- $90 Hitch Carrier (used)
- $120 Wood and Hardware (estimate)
$550 into the build on the basic setup
Optional Extras
$50 Front Wheel Jack
I think the front wheel can be classified as an optional extra..
That was about $50 shipped.
Total
So that takes us to:
- $365 Just the Trailer
- $550 Build out of ramp and box
- $50 Optional Extras
$915 Total.. let's call it $1,000.
That's more than I expected when I started to add this up, but I'm definitely ok with it. This is a GREAT motorcycle hauler for smaller bikes, and you can't get a motorcycle trailer for that. Add in the camping box functionality and this is definitely a win!
If I were to do it again (and hey, I might on the decking and end pieces) I'd use teak and teak oil instead of pine and marine varnish. I didn't cover it last year and the sun has taken a toll, although it adds to the character.
Ongoing Upgrades
Water Supply
I thought about plumbing in some 4" piping under the trailer deck for water storage but it takes quite a lot of pipe per gallon, and there's already a water storage solution tried and tested. Jerry Cans in Jerry Can holders.
There are many options for water jerry cans, but (strangely) only ONE with a built in tap. Seems like a no brainer feature for me. I don't want to just CARRY water, I want a water SUPPLY when I'm stopped.
Here's the product by FrontRunner at frontrunneroutfitters.com
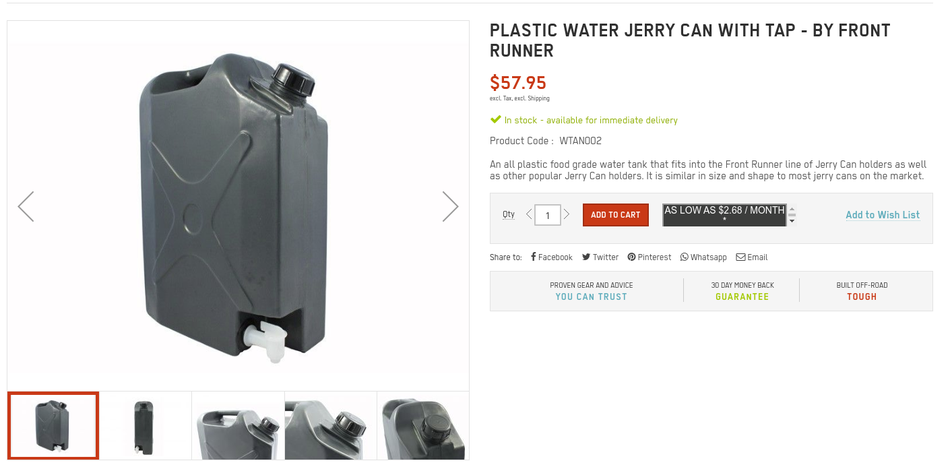
Also available on Amazon from the same seller, but cheaper to buy direct. Amazon reviews highlight serious issues with the tap. People hate it. It's hard to turn, and it's hard to GET to, but I battled on and bought it anyway. What I didn't order until having this in my hands was a carrier. This is NATO style, and seems like there are slight differences between this and typical US cans, so the actual fit of the carrier is important.
More importantly though, I don't see how the tap will work when it's actually IN a carrier, and that is a problem that has to be solved. I want an easily accessible water supply!
When it arrived I get what people are saying about the tap.. it's hard as hell to get to and to turn even when the can is sitting on a flat surface. Inside your typical carrier it's just not going to work. With that in mind, I decided to order a carrier that had a decent amount of metalwork, knowing that I will likely have to cut some away to solve both of these problems.
This is the one I chose.
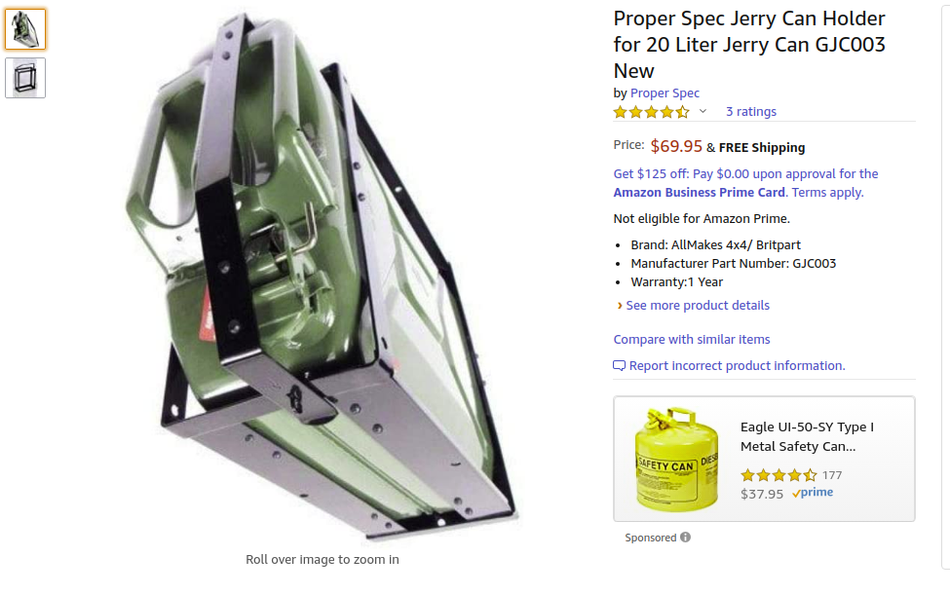
Super happy with the build of this. Very solid, and nice mounting options for my trailer. Now that damn spigot!
Because the spigot is on the left of the can, I chose to mount this at the back of the trailer so it's more accessible. I went through my various bits and pieces at home, and found that the best way forward was to use hose pipe hardware.
I THINK that the thread on the jerry can for the tap is standard 3/4" pipe thread, not 3/4 hose pipe thread. I say I THINK because now that I look at the (out of stock) brass tap upgrade available from FrontRunner the thread on that really does look like hose pipe. For me it was a bit of a toss up, but the plastic of the jerry can thread seemed to take standard pipe thread better, and I had a nice brash fitting with a collar, so I went with that.
See the video for end results, but I basically did:
- brass 3/4 pipe to 3/4 hose pipe adapter
- small brass hose pipe on off, with nicely positioned on/off valve
- cut some metal out of the carrier to allow better straight on access to the water supply
- added a hose to pipe thread adapter to the original tap. It's actually an OK tap.. just not when you can't access it well.
I basically have two "modes".
Travel mode, where I have easy access to water using the valve. The valve is compact, and fits within the foot print of the jerry can cut out, so no issue with it sitting on the ground, or snagging on the carrier.
Camping mode where I add the original tap back on giving BETTER access to water with nice clearance and easy tap turning.
The end result is very satisfying! The design of the trailer allows the weight of the can to rest on it, so the 4 mounting points are just stopping it from pivoting rather than holding the entire weight.


Lighting
The traditional bulbs in the trailer lighting are not playing nice with the LED lights in the van. Looks like the drop in current draw by the LED lights has a knock on impact on the trailer lights, which appear dimmer, and lazy to come on. The turn signals barely glow before the relay is cutting the signal again.
Easy problem to solve.. and cheap!
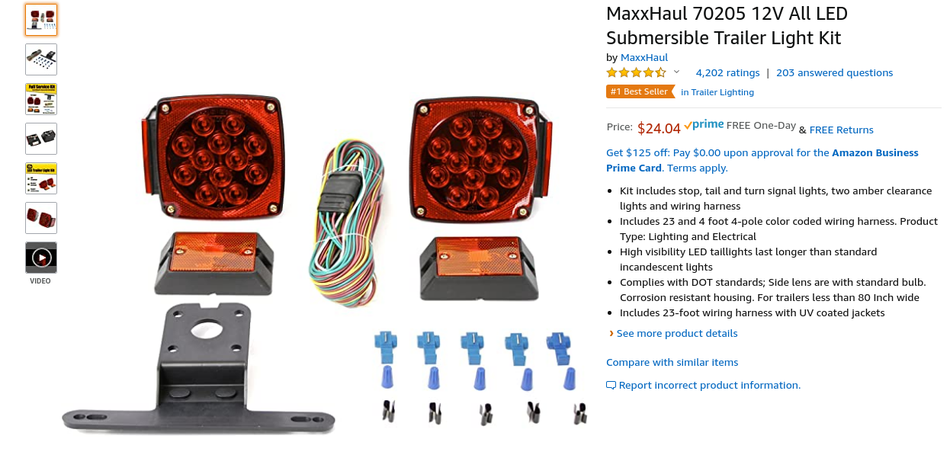
These work really well! Took me about 30 minutes to swap in the rear lights and decide I didn't want to fight the wiring for the front ones until another time. Thanks to the included harness, I now have what I need to rewire the trailer when and if I extend the tongue.
More Surface Area
As a worktop the toolbox has felt a little bit cramped. With the gas grill on top of it there's just not quite enough room to deal with food prep and service. I thought up some really fancy solutions but in the end went with a couple of simple mods.
1) (Photos to come) I created an extension that connects to the jerry can on the left that supports the gas grill giving me about an extra foot.
2) This combo of a big cutting board and retractable shelf hardware to create an additional solid platform to the right. And it is solid! I may or may not have to create a latch to make sure it doesn't flap up while driving, but when locked in the up position it is really solid. Works great. Looking forward to the next outing!


To Do / Wish List / In Progress
REWIRE
Is there some kind of regulation that trailer wiring has to be unreliable? Planning on running a Schedule 40 pipe from back to front to carry wiring and completely redo this.
TONGUE EXTENSION
On the fence here. The tongue is short, and if it was longer I could back the trailer up into an L shape for camping without even unhooking it. That appeals. I have to of course make things complicated! The easy thing to do would be to buy 1/8" 2x2 square tune and just mount it the same way as the current one is, but longer at the front. It really appeals to me to have a hitch at the back through! Could be handy for a bike mount, or a pickup bed extension.. or.. or.. lots of things. With that in mind, if I do it, I'll get a 9" length of 2.500 X 2.500 X 0.238, which is what is typically used for hitches. I can then just run that all the way from the tongue to out the back. That's a bit beefier though. Will mean more work drilling it out, and of course, any tongue extension dictates a rewire. So.. like I said.. on the fence!
How does it work?
REALLY well.
Firstly, let's talk about the motorcycle side of it. Setting up camp in a Vanagon with a two seater Honda 50 (upgraded) coming along for the ride is the mini equivalent of dragging a jeep behind an RV. I built this trailer originally to take my offroad vintage Honda CT90 into the hills, but when I'm out and about with my wife, the Honda 50 is epic. We went camping out in the middle of nowhere, and were still able to jump on the bike and ride 10 miles around on dirt roads into the middle of the middle of nowhere. It was amazingly liberating.
Secondly, the rest. It's not that big.. but it's everything and it's multipurpose:
- it's storage
- it's organization of all things to do with camp cooking and more
- it's ready to go
- it's a stable easy to access water supply
- it's a work surface for food prep and cooking
- the bike side, minus the bike, is an organization / storage surface for things that got hauled along in the van.
Put that all together and it is the difference between constantly moving stuff around in a cluttered van, and having absolutely nothing in the van that doesn't need to be there.. it's a miraculous feng shui shift and takes the joy of the Vanagon to a whole new level. The storage capacity of the trailer isn't huge, but the same amount of stuff in the van is a HUGE MESS.
I went through a reorganization process for everything I want to carry all the time, and just when camping.
In the van always: Coffee making supplies and mini stove. Sleeping stuff, camping chairs and games. Tools & Spares. Awning extension and tent poles / pegs. Hammock. Tarp. I have a trunk organizer in the back of the van for loading up groceries into.
In the trailer always: Grill. Utensils, camping cookware and plates etc. BusDepot tailgate tent. Washing up stuff. Spices / condiments and the general random things like trash bags, towels etc.
I have a waterproof chest from The Container Store that fits between back seat and tail gate perfectly. That lives in the house and gets packed with clothes etc. and loaded up in the van.
Loading up, the trunk organizer gets moved to the cab, and loaded up with well organized snacks / non cooler food, technology, etc.
I have a cooler that goes behind the passenger seat.
When I hit camp, the waterproof box with clothes, toiletries etc. moves to the trailer and stays there. The trunk organizer gets moved to between the front seats, the passenger seat is turned round (ice chest becomes a foot rest) and the driver seat is the designated "dumping area" for random stuff.
It's soooo tidy and soooo easy to keep uncluttered.


It's so painless that during this crazy COVID time, I've even hooked it up and driven to the grassy edge of my local park, fired up the grill and hung out.
Write a comment
Ben Lingers (Friday, 15 December 2023 23:45)
Where can purchase the rail for a motorcycle and hardware
Sam (Wednesday, 12 February 2025 18:20)
Words cannot describe how much I love this little trailer, dude. Great work
nate (Saturday, 10 May 2025 19:24)
this is the most ridiculous build I've seen fot this trailer and has inspired me to build something similar. excellent work